# Introduction
**TresJS** is an open-source library that provides a declarative way of using **Three.js** in Vue. Build your scenes using **Vue components** in a declarative way with all the power of Vue's reactivity.
TresJS (pronounced `"/tres/"`, Spanish for "three") builds upon Three.js by creating a Vue 3 custom renderer that transforms Vue components into Three.js objects. The library aims to make 3D web development more accessible by leveraging Vue's reactivity system and component-based architecture, while maintaining compatibility with the latest Three.js features.
::scene-wrapper
:intro-scene
::
### Why TresJS?
**Three.js** is an incredibly powerful 3D library, but it can have a steep learning curve, especially for developers coming from component-based frameworks like Vue. TresJS bridges this gap by:
- **🧩 Familiar Components**: Use Vue components to build your 3D scenes instead of imperative Three.js code.
- **⚡ Reactive by Default**: Leverage Vue's reactivity system to create dynamic 3D experiences.
- **📦 Composables**: Access powerful composables that encapsulate common 3D patterns and functionality.
- **🎯 Declarative**: Describe *what* your scene should look like, not *how* to build it step by step.
- **🔧 Developer Experience**: Get the full Vue developer experience with hot module replacement, TypeScript support, and Vue DevTools integration.
### From Imperative to Declarative
Instead of writing imperative Three.js code like this:
```ts [scene.ts]
const scene = new THREE.Scene()
const camera = new THREE.PerspectiveCamera(75, window.innerWidth / window.innerHeight, 0.1, 1000)
const renderer = new THREE.WebGLRenderer()
const geometry = new THREE.BoxGeometry()
const material = new THREE.MeshBasicMaterial({ color: 0x00FF00 })
const cube = new THREE.Mesh(geometry, material)
scene.add(cube)
```
You can write declarative Vue components:
```vue
```
This approach **reduces the learning curve** significantly while preserving all the power and flexibility of Three.js.
### Component Name Casing
Throughout the guide, we are using PascalCase names when registering components.
:read-more{to="https://vuejs.org/guide/components/registration.html#component-name-casing"}
Tres also supports the usage of kebab-case for its components. If you want to use the kebab-case notation in combination with the TresJS eslint config, you should deactivate the rule
`vue/component-name-in-template-casing` in your eslint configuration.
# Installation
## Quick Start (Recommended) :u-icon{name="i-heroicons-rocket-launch"}
The fastest way to get started with TresJS is using our interactive CLI wizard:
::code-group
```bash [npm]
npx create-tres my-tres-project
```
```bash [yarn]
yarn create tres my-tres-project
```
```bash [pnpm]
pnpm create tres my-tres-project
```
::
The CLI provides an **interactive wizard** that guides you through:
::prose-list
- 🎯 **Template selection**: Choose between Vue + Vite or Nuxt
- 📦 **Ecosystem packages**: Select from TresJS ecosystem packages (Cientos, Post-processing, Leches)
- 🔧 **TypeScript support**: Type safe development with TypeScript
- 📏 **ESLint integration**: Code quality with TresJS ESLint config
::
:video-accordion{start-time="29" title="Watch this video from Alvarosabu about the TresJS CLI" video-id="XsXfF9-qe60"}
::prose-note
This is the **recommended approach** for new projects as it handles all the configuration automatically and lets you choose exactly what you need.
::
---
## Manual Installation
If you prefer to set up TresJS manually or add it to an existing project, follow the instructions below:
## Vue project
::steps
### Install TresJS and Three.js
Install the core TresJS package and the Three.js dependency:
:::code-group
```bash [npm]
npm install @tresjs/core three
```
```bash [yarn]
yarn add @tresjs/core three
```
```bash [pnpm]
pnpm add @tresjs/core three
```
:::
### Install TypeScript types (Optional)
If you're using TypeScript, install the Three.js type definitions:
:::code-group
```bash [npm]
npm install @types/three -D
```
```bash [yarn]
yarn add @types/three -D
```
```bash [pnpm]
pnpm add @types/three -D
```
:::
### Configure Vite
Add the TresJS template compiler options to your `vite.config.ts`:
```typescript [vite.config.ts]
import { templateCompilerOptions } from '@tresjs/core'
import { defineConfig } from 'vite'
import vue from '@vitejs/plugin-vue'
export default defineConfig({
plugins: [
vue({
// Other config
...templateCompilerOptions
}),
],
})
```
:::prose-warning
This configuration is required to make the template compiler work with the TresJS custom renderer and prevent console warnings.
:::
::
### Ecosystem packages (Optional)
Install additional TresJS ecosystem packages for extended functionality:
::code-group
```bash [npm]
npm install @tresjs/cientos @tresjs/post-processing
```
```bash [yarn]
yarn add @tresjs/cientos @tresjs/post-processing
```
```bash [pnpm]
pnpm add @tresjs/cientos @tresjs/post-processing
```
::
::prose-note
These packages will be automatically imported by the [Nuxt module](https://docs.tresjs.org/getting-started/installation#nuxt-project):
- **Cientos**: A collection of useful helpers and components
- **Post-processing**: Post-processing effects for enhanced visuals
::
## Nuxt project :u-icon{name="i-simple-icons-nuxt"}
If you're using Nuxt, you can use the official TresJS Nuxt module for a seamless integration experience.
::steps
### Install the Nuxt module
Install the TresJS Nuxt module and Three.js:
:::code-group
```bash [npm]
npm install three @tresjs/nuxt
```
```bash [yarn]
yarn add three @tresjs/nuxt
```
```bash [pnpm]
pnpm add three @tresjs/nuxt
```
:::
### Configure the module
Add `@tresjs/nuxt` to the `modules` section of your `nuxt.config.ts`:
```typescript [nuxt.config.ts]
export default defineNuxtConfig({
modules: ['@tresjs/nuxt'],
})
```
### Start using TresJS
That's it! The module provides several benefits:
:::prose-list
- 🤓 **Auto-import** components and composables from the TresJS ecosystem
- 🖥️ **Client-only rendering** for `TresCanvas` (no need for `.client` suffix or ``)
- ⚙️ **Automatic configuration** of the Vue compiler for TresJS components
- ✨ **DX Magic** that comes with Nuxt
:::
::
# Your First Scene
## What You'll Build
By the end of this guide, you'll have created:
- A 3D scene with a rotating donut
- A reusable component structure
- Animation using TresJS composables
:examples-my-first-scene
::steps{level="2"}
## Step 1: Set Up the Canvas Component
First, let's create the main canvas component that will host our 3D scene. This component will contain the `TresCanvas` and handle the overall scene setup.
```vue [app.vue]
```
:::note
The `TresCanvas` component is the root container for your 3D scene. The `clear-color` prop sets the background color, and `window-size` makes the canvas automatically fill the entire window without needing a parent container.
:::
## Step 2: Set Up the Camera
Let's start by creating the experience component with just a camera. This will allow us to see the clear background color of our canvas.
:::tip
**Best Practice**: We recommend separating your `TresCanvas` component from your 3D experience. This pattern helps with organization, reusability, and makes your code easier to maintain.
:::
```vue [components/FirstExperience.vue]
```
**What you should see**: A solid turquoise background (`#82DBC5`) filling your entire window.
:::note
**Common Mistake**: A common mistake is not setting the camera position, which defaults to `[0, 0, 0]` (the center of the scene). Always position your camera away from the origin to have a proper viewpoint of your 3D objects.
:::
The camera defines the viewpoint of your scene:
- `position="[7, 7, 7]"` places the camera at coordinates X=7, Y=7, Z=7 in 3D space
- `look-at="[0, 0, 0]"` points the camera toward the center of the scene
## Step 3: Add Visual Helpers
Before adding our donut, let's add some visual helpers to better understand the 3D space. These helpers will show us the coordinate axes and a grid.
```vue [components/FirstExperience.vue]
```
**What you should see**: A turquoise background with red, green, and blue arrows showing the X, Y, Z axes, plus a grid on the ground plane.
### Understanding the Helpers
- **`TresAxesHelper`**: Shows the coordinate system with colored arrows
- **Red arrow**: X-axis (left/right)
- **Green arrow**: Y-axis (up/down)
- **Blue arrow**: Z-axis (forward/backward)
- **`TresGridHelper`**: Shows a grid on the XZ plane (ground)
- Helps visualize object positioning and scale
- The grid center is at the origin (0, 0, 0)
:::tip
**Development Tip**: These helpers are invaluable for development and debugging. Remove them when your scene is ready for production!
:::
## Step 4: Add the Donut
Now let's add our 3D donut to the scene. In TresJS, 3D objects are created using a `TresMesh` component with geometry and material as children.
```vue [components/FirstExperience.vue]
```
**What you should see**: A bright orange donut shape in the center of your scene!
### Understanding the Mesh Structure
In TresJS, 3D objects follow a **slot-based pattern**:
- `TresMesh` is the container that represents a 3D object
- The first child defines the **geometry** (shape)
- The second child defines the **material** (appearance)
**Geometry Parameters:**
- `TresTorusGeometry` creates the donut shape with an array of parameters `[radius, tube, radialSegments, tubularSegments]`:
- `radius: 1` - Overall size of the donut
- `tube: 0.4` - Thickness of the donut tube
- `radialSegments: 16` - How smooth the donut curve is
- `tubularSegments: 32` - How smooth the tube surface is
**Material Types:**
- `TresMeshBasicMaterial` - Simple material that doesn't require lighting
- Perfect for beginners and solid colors
## Step 5: Add Animation
Finally, let's make our donut rotate! We'll use TresJS's `useLoop` composable to create smooth animations.
```vue [components/FirstExperience.vue]
```
**What you should see**: Your donut now rotates smoothly on both the X and Y axes!
### Understanding Animation
The animation (system) consists of:
1. **Template Ref**: `ref="donutRef"` creates a reference to the mesh object
2. **useLoop Hook**: Provides access to the render loop
3. **onBeforeRender**: Runs before each frame is rendered
4. **Elapsed Time**: `elapsed` parameter gives us the total time since animation started
```typescript
onBeforeRender(({ elapsed }) => {
if (donutRef.value) {
donutRef.value.rotation.x = elapsed * 0.5 // Rotates on X-axis
donutRef.value.rotation.y = elapsed * 0.3 // Rotates on Y-axis (different speed)
}
})
```
:::note
Using `elapsed` time creates smooth, time-based animations that run consistently regardless of frame rate. The multipliers (0.5 and 0.3) control the rotation speed on each axis.
:::
## Step 6: Running Your Scene
Your scene is now complete! Since we've set up everything in `app.vue`, your 3D scene will automatically render when you start your application. The `window-size` prop ensures the canvas fills the entire viewport automatically.
::
## Final Project Structure
Here's the complete file structure and code for your first TresJS scene:
::code-tree{default-value="components/FirstExperience.vue"}
```vue [app.vue]
```
```vue [components/FirstExperience.vue]
```
```typescript [main.ts]
import { createApp } from 'vue'
import App from './App.vue'
createApp(App).mount('#app')
```
```json [package.json]
{
"name": "my-first-scene",
"private": true,
"version": "0.0.0",
"type": "module",
"scripts": {
"dev": "vite",
"build": "vue-tsc && vite build",
"preview": "vite preview"
},
"dependencies": {
"@tresjs/core": "latest",
"three": "^0.158.0",
"vue": "^3.3.0"
},
"devDependencies": {
"@vitejs/plugin-vue": "^4.4.0",
"typescript": "^5.0.2",
"vite": "^4.4.5",
"vue-tsc": "^1.8.5"
}
}
```
```typescript [vite.config.ts]
import { templateCompilerOptions } from '@tresjs/core'
import { defineConfig } from 'vite'
import vue from '@vitejs/plugin-vue'
export default defineConfig({
plugins: [
vue({
// Other config
...templateCompilerOptions
}),
],
})
```
::
## Key Concepts Learned
::card-group
:::card{icon="i-lucide-layers" title="Component Separation"}
Separating `TresCanvas` from your 3D experience improves code organization and reusability.
:::
:::card{icon="i-lucide-donut" title="Objects and Materials"}
In TresJS, 3D objects are created using a `TresMesh` component with geometry and material as children.
:::
:::card{icon="i-lucide-rotate-cw" title="Animation Loop"}
Using `useLoop` provides a clean way to handle animations and updates in your 3D scene.
:::
:::card{icon="i-lucide-link" title="Template Refs"}
Using Vue's template refs allows you to directly manipulate 3D objects in your animations.
:::
::
## Next Steps
Now that you have your first scene running, you can:
- **Extract the donut into its own component** - Create a `TheDonut.vue` component to practice component composition
- Experiment with different geometries and materials
- Add more objects to your scene (Get inspired by Three.js's [Geometries](https://threejs.org/manual/#en/primitives){rel=""nofollow""} and [Materials](https://threejs.org/manual/#en/materials){rel=""nofollow""})
- Try different camera positions and angles
- Explore more complex animations
::tip
Check out our [Cookbook](https://docs.tresjs.org/cookbook) section to see more complex scenes and learn advanced techniques!
::
::callout{icon="i-lucide-grid-3x3"}
**Related Examples Placeholder**: Add a component here showing cards with related examples like "Basic Primitives", "Lighting Setup", "Animation Patterns", etc.
::
# Upgrade Guide
## Upgrading TresJS
### Latest Release
::warning
This document covers the upgrade process from version 4.x to version 5.x. It's currently on nightly builds so you expect possible breaking changes.
::
To upgrade TresJS to the [latest next release](https://github.com/tresjs/tres/releases){rel=""nofollow""}, run the following command:
::code-group
```bash [pnpm]
pnpm add tresjs@next
```
```bash [npm]
npm install tresjs@next
```
```bash [yarn]
yarn add tresjs@next
```
::
### Major Version Upgrades
When upgrading to a new major version of TresJS, you may need to make changes to your code. Below are the breaking changes introduced in v5 and how to migrate your code.
## Breaking Changes in v5
### ESM-only Build
🚦 Impact Level: High
#### What Changed
TresJS v5 is now ESM (ES Module) only. The UMD build configuration has been removed.
#### Why We Changed It
- Modern JavaScript ecosystem has moved towards ESM
- Better tree-shaking and smaller bundle sizes
- Improved TypeScript support
- Aligns with Vue 3 and modern tooling
#### Migration Steps
1. **Update your import statements** to use ESM syntax:
```js
// ❌ Old CommonJS (no longer supported)
const { TresCanvas } = require('@tresjs/core')
// ✅ New ESM syntax
import { TresCanvas } from '@tresjs/core'
```
2. **Update your build configuration** to support ESM:
```json
// package.json
{
"type": "module"
}
```
3. **If using Node.js**, ensure you're using Node.js 14+ and update your imports:
```js
// ❌ Old
const Tres = require('@tresjs/core')
// ✅ New
import * as Tres from '@tresjs/core'
```
### `useLoader` Composable refactor
🚦 Impact Level: High
#### What Changed
The `useLoader` composable has been completely refactored from a simple utility function wrapping Three.js loaders into a true Vue composable based on `useAsyncData`. It now returns a reactive state with loading, error handling, and progress tracking. It previously wasn't a true composable but a utility wrapping Three.js loaders. 😬
- Is now based on [`useAsyncData`](https://nuxt.com/docs/4.x/api/composables/use-async-data){rel=""nofollow""} for better Vue integration
- Provides reactive state management with loading states
- Includes progress tracking and error handling
- Better TypeScript support and developer experience
- Automatic cleanup and disposal of 3D objects
#### Migration Steps
1. **Update from promise-based to reactive state**:
```js
// ❌ Old v4 syntax - returned a promise
const gltf = await useLoader(GLTFLoader, '/models/duck.gltf')
// ✅ New v5 syntax - returns reactive state
const { state: gltf, isLoading, error } = useLoader(GLTFLoader, '/models/duck.gltf')
```
2. **Handle loading states reactively**:
```vue
```
3. **Add loader extensions (like DRACO)**:
```js
// ✅ New v5 syntax with extensions
const { state: model, isLoading, progress } = useLoader(
GLTFLoader,
'/models/compressed.glb',
{
extensions: (loader) => {
if (loader instanceof GLTFLoader) {
loader.setDRACOLoader(dracoLoader)
}
}
}
)
```
4. **Dynamic path loading**:
```js
// ✅ New v5 supports reactive paths
const modelPath = ref('/models/duck.gltf')
const { state: model, load } = useLoader(GLTFLoader, modelPath)
// Change path reactively
modelPath.value = '/models/fox.gltf' // Automatically reloads
// Or load programmatically
load('/models/another-model.gltf')
```
5. **Texture loading example**:
```js
// ✅ New v5 texture loading
const { state: texture, isLoading } = useLoader(
TextureLoader,
'https://example.com/texture.jpg'
)
```
### useTexture removal
🚦 Impact Level: Moderate
#### What Changed
The `useTexture` composable has been completely removed from the core package and moved to `@tresjs/cientos`.
#### Why We Changed It
- Better separation of concerns
- Reduced core bundle size
- More specialized texture handling in cientos package
#### Migration Steps
1. **Install @tresjs/cientos**:
```bash
pnpm add @tresjs/cientos
```
2. **Update your imports**:
```js
// ❌ Old v4 import
import { useTexture } from '@tresjs/core'
// ✅ New v5 import
import { useTexture } from '@tresjs/cientos'
```
3. **Usage updated**:
```js
// ✅ Composable now returns reactive state with loading state
const { state: texture, isLoading } = useTexture('/textures/brick.jpg')
```
### Event System Changes
🚦 Impact Level: Moderate
#### What Changed
- New event system based on the [`@pmndrs/pointer-events`](https://github.com/pmndrs/pointer-events){rel=""nofollow""} package.
- Only the first intersected element will trigger pointer events.
- `useTresEventManager` composable has been removed.
- Pointer events now follow native DOM event names exactly as they are defined, '@pointer-down' --> '@pointerdown'. See [MDN Web docs](https://developer.mozilla.org/en-US/docs/Web/API/Pointer_events#event_types_and_global_event_handlers){rel=""nofollow""} for more details.
#### Why We Changed It
- Better performance with complex scenes
- More predictable event handling
- Consistent with web standards and pmndrs ecosystem
- Prevents event bubbling issues
- Leverages battle-tested pointer event handling from the pmndrs community
- Keeps the API consistent with the web standard.
#### Migration Steps
1. **Update event handling expectations**:
```js
// ❌ Old behavior: multiple overlapping objects could trigger events
// ✅ New behavior: only first intersected object triggers event
// If you need multiple objects to handle events, ensure they don't overlap
// or handle the event at a parent level
```
2. **Restructure overlapping interactive elements**:
```js
// ✅ Use a single parent handler for overlapping elements
```
3. **Replace dash-case pointer events**:
```js
// ❌ Old behavior: dash-case events
// ✅ New behavior: native DOM event names
```
### Camera Context Changes
🚦 Impact Level: Low
#### What Changed
Camera context is now a state object instead of the active camera instance.
#### Why We Changed It
- Better camera management
- Support for multiple cameras
- Improved camera switching
#### Migration Steps
**Easy Migration Path:**
For most use cases it is probably sufficient to change `useTresContext` to `useTres`:
```js
// ❌ Old v4 syntax
const { camera } = useTresContext()
// ✅ Easy v5 migration
const { camera } = useTres()
// camera works the same as before
```
**Advanced Usage:**
If you need the full context (mainly for module authors), use `useTresContext`:
```js
// ✅ For module authors - full context access
const { camera } = useTresContext()
// camera is now an object with camera management methods
const activeCamera = camera.value.current
```
::read-more
Learn more about the context system in our [internal documentation](https://docs.tresjs.org/api/composables/use-tres-context).
::
### Renderer and Context Changes
🚦 Impact Level: Moderate
#### What Changed
- Performance state removed from context
- Renderer instance is now readonly
- `invalidate`, `advance`, `canBeInvalidated` and renderer instance now accessed through context
#### Why We Changed It
- Better encapsulation
- Improved performance monitoring
- More consistent API
#### Migration Steps
**Easy Migration Path:**
For most use cases it is probably sufficient to change `useTresContext` to `useTres`:
```js
// ❌ Old v4 syntax
const { renderer, invalidate, advance } = useTresContext()
// ✅ Easy v5 migration
const { renderer, invalidate, advance } = useTres()
// Works the same as before for common use cases
```
**Advanced Usage:**
If you need the full context (mainly for module authors), use `useTresContext`:
```js
// ✅ For module authors - full context access
const { invalidate, advance, canBeInvalidated, renderer } = useTresContext()
// renderer is now readonly
// Use context methods for renderer operations
```
**Performance monitoring changes**:
```js
// ❌ Old v4 performance access
const { performance } = useTresContext()
// ✅ New v5 - use renderer stats or custom performance monitoring
const { renderer } = useTres()
const stats = renderer.info
```
::read-more
Learn more about the context system in our [internal documentation](https://docs.tresjs.org/api/composables/use-tres-context).
::
### Deprecated Composables Removal
🚦 Impact Level: Moderate
#### What has been removed
- `useTresReady`
- `useSeek`
- `useTresEventManager`
- `useRaycaster`
- `useRenderLoop`
- `useLogger`
- `useCamera`
#### Why We Changed It
- Simplified API surface
- Better state management patterns
- Replaced with more robust alternatives
#### Migration Steps
1. **Replace useTresReady**:
```js
// ❌ Old v4 syntax
const { isReady } = useTresReady()
```
```vue
```
```js
// Option 2: Composable approach (advanced users)
const { renderer } = useTresContext()
renderer.onReady((rendererInstance) => {
console.log('Renderer ready:', rendererInstance)
// Your ready logic here
})
```
2. **Replace useSeek** (if you were using it):
```js
// ❌ Old v4 syntax
const { seek, seekByName, seekAll, seekAllByName } = useSeek()
const body = seek(car, 'name', 'Octane_Octane_Body_0')
const bones = seekAll(character, 'type', 'Bone')
// ✅ New v5 alternative - use useGraph or manual traversal
import { useGraph } from '@tresjs/core'
// Option 1: Use useGraph for structured access
const { state: model } = useLoader(GLTFLoader, '/path/to/model.glb')
const scene = computed(() => model.value?.scene)
const { nodes, materials } = useGraph(scene)
// Access objects by name directly
const body = computed(() => nodes.value?.Octane_Octane_Body_0)
// Option 2: Manual traversal function
function seek(object, property, value) {
if (!object) return null
if (object[property] === value) return object
for (const child of object.children) {
const found = seek(child, property, value)
if (found) return found
}
return null
}
// Usage
const body = seek(car.value, 'name', 'Octane_Octane_Body_0')
```
3. **Replace useRenderLoop**:
```js
// ❌ Old v4 syntax
const { onLoop } = useRenderLoop()
onLoop(({ delta, elapsedTime }) => {
// Your loop logic here
})
```
```js
// ✅ New v5 alternative - use context methods
const { onBeforeRender } = useLoop()
onBeforeRender(({ delta, elapsedTime }) => {
// Your loop logic here
})
```
::warning
`useLoop` can only be used in child components of a [`TresCanvas`](https://docs.tresjs.org/api/components/tres-canvas) component, as its data is provided by [`TresCanvas`](https://docs.tresjs.org/api/components/tres-canvas).
::
::read-more{to="https://docs.tresjs.org/api/composables/use-loop"}
Learn more about the `useLoop` composable.
::
If the composable was used on a SFC (single file component), you can use the `loop` event on the `TresCanvas` component:
```vue
```
4. **Replace useCamera**:
```js
// ❌ Old v4 syntax
const { camera } = useCamera()
```
```js
// ✅ New v5 alternative - use context methods
const { camera } = useTres()
```
### TresCanvas Props Reactivity Changes
🚦 Impact Level: Low to Moderate
#### What Changed
Several TresCanvas props are no longer reactive and are marked as `@readonly`. These props were used to initialize the WebGL context and cannot be changed after the renderer is created without recreating the entire renderer and replacing the canvas element.
**Props that lost reactivity:**
- `alpha` - WebGL context alpha buffer setting
- `depth` - Depth buffer configuration
- `stencil` - Stencil buffer configuration
- `antialias` - Anti-aliasing setting
- `logarithmicDepthBuffer` - Logarithmic depth buffer setting
- `preserveDrawingBuffer` - Drawing buffer preservation
- `powerPreference` - GPU power preference (`default`, `high-performance`, `low-power`)
- `failIfMajorPerformanceCaveat` - Performance caveat handling
**Props that remain reactive:**
- `shadows` - Shadow rendering
- `clearColor` - Background clear color
- `clearAlpha` - Clear color opacity
- `toneMapping` - Tone mapping technique
- `shadowMapType` - Shadow map type
- `toneMappingExposure` - Tone mapping exposure
- `outputColorSpace` - Output color space
- `useLegacyLights` - Legacy lights system
- `renderMode` - Render mode setting
- `dpr` - Device pixel ratio
#### Why We Changed It
WebGL context initialization parameters must be set when the WebGL context is created. These settings are passed directly to the WebGL renderer constructor and cannot be modified without recreating the entire renderer, which would be expensive and disruptive.
#### Migration Steps
1. **Set context initialization props as static values**:
```vue
```
2. **For conditional rendering based on device capabilities**:
```vue
```
3. **Update dynamic renderer options**:
```vue
```
## Summary
These breaking changes represent a major architectural improvement in TresJS v5, focusing on:
- Modern ESM standards
- Better TypeScript support
- Improved performance
- More predictable behavior
- Cleaner API surface
Take your time migrating and test thoroughly. The new APIs provide better developer experience and performance once migrated.
# Custom Vue Renderer
::warning
This page is a work in progress.
::
This page documents how TresJS leverages Vue 3's custom renderer API to transform Vue components into Three.js objects. The custom renderer is one of the core architectural elements of TresJS, allowing developers to use declarative Vue syntax to construct and manipulate 3D scenes.
## What is a custom renderer?
Vue 3 introduced the ability to create custom renderers that target platforms beyond the DOM. While Vue's standard renderer transforms Vue components into DOM elements, a custom renderer can transform them into anything—in TresJS's case, Three.js objects.
### The Traditional DOM Renderer
In a typical Vue application, the renderer creates and manipulates DOM elements:
```javascript [dom-renderer-concept.js]
// Vue's DOM renderer operations
const div = document.createElement('div') // Create element
div.textContent = 'Hello World' // Set properties
document.body.appendChild(div) // Mount to parent
div.style.color = 'red' // Update properties
document.body.removeChild(div) // Unmount
```
### TresJS Three.js Renderer
TresJS implements a custom renderer that performs analogous operations with Three.js objects:
```javascript [tres-renderer-concept.js]
// TresJS renderer operations
const mesh = new THREE.Mesh() // Create Three.js object
mesh.material = new THREE.MeshBasicMaterial() // Set properties
scene.add(mesh) // Add to scene graph
mesh.position.set(1, 2, 3) // Update properties
scene.remove(mesh) // Remove from scene
```
## The Custom Renderer API
The custom renderer in TresJS (nodeOps) implements a set of operations that Vue calls when it needs to:
- Create a new Three.js object
- Add an object to the scene or to another object
- Update an object's properties
- Remove an object from the scene.
# Declarative vs Imperative
## Understanding the Paradigm Shift
TresJS fundamentally changes how you create 3D scenes by transforming Three.js's imperative approach into a declarative, component-based system. This shift makes 3D development more intuitive for Vue developers while maintaining the full power of Three.js.
## Imperative Three.js Approach
In traditional Three.js development, you write **imperative code** - explicit instructions telling the computer exactly what to do step by step:
```js [three-js-scene.js]
import * as THREE from 'three'
// Create scene, camera, and renderer
const scene = new THREE.Scene()
const camera = new THREE.PerspectiveCamera(75, window.innerWidth / window.innerHeight, 0.1, 1000)
const renderer = new THREE.WebGLRenderer()
renderer.setSize(window.innerWidth, window.innerHeight)
document.body.appendChild(renderer.domElement)
// Create geometry and material
const geometry = new THREE.BoxGeometry(1, 1, 1)
const material = new THREE.MeshBasicMaterial({ color: 0x00FF00 })
const cube = new THREE.Mesh(geometry, material)
// Add to scene and position
scene.add(cube)
camera.position.z = 5
// Render loop
function animate() {
requestAnimationFrame(animate)
cube.rotation.x += 0.01
cube.rotation.y += 0.01
renderer.render(scene, camera)
}
animate()
```
### Challenges with Imperative Code
- **Manual State Management**: You must manually track and update object states.
- **Complex Cleanup**: Requires explicit disposal of geometries, materials, and resources.
- **Verbose Setup**: Lots of boilerplate code for basic scenes.
- **Hard to Maintain**: Difficult to modify or extend as complexity grows.
## Declarative TresJS Approach
TresJS transforms this into **declarative code** - you describe what you want, not how to achieve it:
```vue [tres-scene.vue]
```
### Benefits of Declarative Code
- **Reactive State Management**: Vue's reactivity automatically handles updates.
- **Automatic Cleanup**: TresJS manages resource disposal automatically.
- **Intuitive Syntax**: HTML-like template syntax, which is familiar to Vue developers.
- **Easier Maintenance**: The component structure makes your code more modular and reusable.
## Side-by-Side Comparison
Let's compare how common 3D operations are handled in both approaches:
### Creating a Scene with Lighting
::code-group
```js [Three.js (Imperative)]
// Setup scene, camera, renderer
const scene = new THREE.Scene()
const camera = new THREE.PerspectiveCamera(75, window.innerWidth / window.innerHeight, 0.1, 1000)
const renderer = new THREE.WebGLRenderer()
renderer.setSize(window.innerWidth, window.innerHeight)
document.body.appendChild(renderer.domElement)
// Add lights
const ambientLight = new THREE.AmbientLight(0x404040, 0.5)
scene.add(ambientLight)
const directionalLight = new THREE.DirectionalLight(0xFFFFFF, 1)
directionalLight.position.set(5, 5, 5)
scene.add(directionalLight)
// Create and add objects
const geometry = new THREE.SphereGeometry(1, 32, 32)
const material = new THREE.MeshStandardMaterial({ color: 0xFF6B35 })
const sphere = new THREE.Mesh(geometry, material)
scene.add(sphere)
// Render loop
function animate() {
requestAnimationFrame(animate)
renderer.render(scene, camera)
}
animate()
```
```vue [TresJS.vue (Declarative)]
```
::
### Reactive Property Updates
::code-group
```javascript [Three.js (Imperative)]
let currentColor = 0xFF0000
let sphere
function changeColor() {
currentColor = currentColor === 0xFF0000 ? 0x00FF00 : 0xFF0000
sphere.material.color.setHex(currentColor)
}
// Manual event handling
document.addEventListener('click', changeColor)
```
```vue [TresJS.vue (Declarative)]
```
::
## Why Declarative is Better for 3D
### 1. **Predictable State Management**
Vue's reactivity system ensures that 3D objects always reflect the current state of your data.
### 2. **Component Reusability**
Create reusable 3D components that can be easily composed and customized.
```vue [reusable-sphere.vue]
```
### 3. **Easier Debugging**
The [Vue DevTools](https://devtools.vuejs.org/){rel=""nofollow""} integration allows you to inspect 3D objects and their states visually.
### 4. **Better Developer Experience**
- Type safety with TypeScript
- IDE autocomplete and IntelliSense
- Hot module replacement during development (almost every time)
## Best of Both Worlds
TresJS doesn't force you to choose between paradigms. You can combine both approaches when needed using the `primitive` component for direct Three.js integration:
```vue [hybrid-approach.vue]
```
::tip
This hybrid approach is particularly useful when integrating existing Three.js code or when you need the full power of Three.js for complex operations. Learn more about this in our [Primitives guide](https://docs.tresjs.org/api/advanced/primitives).
::
## Key Takeaways
::card-group
:::card{icon="i-lucide-lightbulb" title="Declarative Benefits"}
Write what you want, not how to achieve it. Let TresJS handle the complex Three.js operations.
:::
:::card{icon="i-lucide-refresh-cw" title="Reactive by Design"}
Leverage Vue's reactivity system for automatic updates and seamless state management.
:::
:::card{icon="i-lucide-layers" title="Component-First"}
Build reusable 3D components that can be composed and extended like any Vue component.
:::
:::card{icon="i-lucide-settings" title="Flexible Architecture"}
Choose the right approach for each use case - declarative for most scenarios, imperative when needed.
:::
::
The declarative approach in TresJS makes 3D development more accessible and maintainable while preserving the full power of Three.js underneath. This paradigm shift allows developers to focus on creating amazing 3D experiences rather than managing complex imperative code.
# Reactivity
## Understanding Reactivity in 3D
Vue's reactivity system is one of its most powerful features, automatically tracking changes and updating the UI accordingly. However, when working with 3D scenes that render at 60+ frames per second, we need to be mindful of how reactivity impacts performance.
TresJS leverages Vue's reactivity while providing patterns that maintain optimal performance in continuous render loops.
## The Performance Challenge
### Vue Reactivity Under the Hood
Vue's reactivity is built on [JavaScript Proxies](https://developer.mozilla.org/en-US/docs/Web/JavaScript/Reference/Global_Objects/Proxy){rel=""nofollow""}, which intercept property access and mutations to track dependencies and trigger updates.
```js [reactivity-basics.js]
// Vue creates a Proxy wrapper around your data
const data = reactive({ x: 0, y: 0, z: 0 })
// Every property access is intercepted
data.x = 5 // Triggers reactivity system
console.log(data.y) // Also intercepted for dependency tracking
```
### The 60FPS Problem
In a typical 3D scene running at 60 FPS, the render loop executes 60 times per second. If you're updating reactive objects in each frame, Vue's reactivity system processes these changes 60 times per second:
```vue [performance-problem.vue]
```
### Performance Impact
Here's a benchmark comparing reactive vs non-reactive object updates:
::card-group
:::card{icon="i-lucide-zap" title="Plain Object"}
**\~50M operations/second**
Direct property access without proxy overhead
:::
:::card{icon="i-lucide-turtle" title="Reactive Object"}
**\~2M operations/second**
Proxy interception adds significant overhead
:::
::
*Source: [Proxy vs Plain Object Performance](https://www.measurethat.net/Benchmarks/Show/12503/0/object-vs-proxy-vs-proxy-setter){rel=""nofollow""}*
## Template Refs: The Preferred Approach
Template refs provide direct access to Three.js instances without reactivity overhead, making them ideal for animations and frequent updates.
### Basic Template Ref Usage
```vue [template-refs.vue]
```
### Multiple Template Refs
For complex scenes with multiple animated objects:
```vue [multiple-refs.vue]
```
## Shallow Reactivity: When You Need Some Reactivity
Sometimes you need reactivity for UI controls while maintaining performance for animations. `shallowRef` and `shallowReactive` provide the perfect balance.
### shallowRef vs ref
::code-group
```vue [shallowRef (Recommended)]
```
```vue [ref (Problematic)]
```
::
### shallowReactive for Object Properties
When you need to reactively update multiple properties independently:
```vue [shallow-reactive.vue]
```
## Best Practices and Patterns
### 1. Initial Positioning vs Animation
Use reactive props for initial positioning and template refs for animation:
```vue [best-practices.vue]
```
### 2. Computed Properties for Complex Calculations
Use computed properties for expensive calculations that shouldn't run in every frame:
```vue [computed-properties.vue]
```
### 3. Lifecycle-Based Updates
Use Vue's lifecycle hooks for performance-sensitive updates:
```vue [lifecycle-updates.vue]
```
## Common Pitfalls and Solutions
### ❌ Pitfall 1: Reactive Animation Data
```vue [pitfall-reactive-animation.vue]
```
**Solution: Use template refs**
```vue [solution-template-refs.vue]
```
### ❌ Pitfall 2: Deep Reactive Arrays
```vue [pitfall-reactive-arrays.vue]
```
**Solution: Non-reactive data with template refs**
```vue [solution-particle-system.vue]
```
## Performance Monitoring
:examples-performance-monitor
Use `@tresjs/leches` [built-in fpsgraph](https://leches.tresjs.org/guide/basics/#graph){rel=""nofollow""} for monitoring performance in your TresJS applications. This control displays real-time FPS information:
```vue [app.vue]
```
::tip
TresLeches automatically displays an FPS graph overlay when you use the `fpsgraph` control. This provides real-time performance insights without manual implementation. Learn more at [TresLeches Documentation](https://leches.tresjs.org/guide/basics/#graph){rel=""nofollow""}.
::
## Key Takeaways
::card-group
:::card{icon="i-lucide-target" title="Template Refs First"}
Use template refs for direct Three.js instance access in render loops to avoid reactivity overhead.
:::
:::card{icon="i-lucide-layers-2" title="Shallow Reactivity"}
Use `shallowRef` and `shallowReactive` when you need some reactivity without deep proxy overhead.
:::
:::card{icon="i-lucide-git-branch" title="Separate Concerns"}
Keep UI state reactive and animation state non-reactive for optimal performance.
:::
:::card{icon="i-lucide-activity" title="Monitor Performance"}
Use Nuxt DevTools and `@tresjs/leches` performance monitoring to identify reactivity bottlenecks in your 3D scenes.
:::
::
::tip
Remember: Vue's reactivity is powerful for UI updates but can be expensive in high-frequency render loops. Choose the right tool for each use case - reactive for user interactions, template refs for animations.
::
By understanding and applying these reactivity patterns, you can create performant 3D experiences that leverage Vue's strengths while avoiding common performance pitfalls.
# Constructor Arguments
## Understanding Constructor Arguments
Many Three.js classes require arguments when instantiated. For example, creating a `PerspectiveCamera` in vanilla Three.js:
```js
import { PerspectiveCamera } from 'three'
// Constructor: PerspectiveCamera(fov, aspect, near, far)
const camera = new PerspectiveCamera(45, 1, 0.1, 1000)
```
TresJS provides the `args` prop to pass these constructor arguments as an array.
## The `args` Prop
The `args` prop accepts an **array of constructor arguments** that are passed directly to the Three.js constructor in order:
```vue
```
::tip
The order of arguments in the array must match the Three.js constructor signature. Check the [Three.js documentation](https://threejs.org/docs/){rel=""nofollow""} for each class's constructor parameters.
::
## Common Examples
### Geometries
Geometries often require dimensional arguments:
```vue
```
### Cameras
```vue
```
### Lights
```vue
```
### Materials with Options Object
Some constructors accept an options object as the first argument:
```vue
```
::warning
When passing an options object, remember it still needs to be wrapped in an array since `args` always expects an array.
::
## When to Use `args` vs Props
TresJS allows setting many properties declaratively via props. Use this rule of thumb:
| Use `args` when... | Use props when... |
| -------------------------------------- | ------------------------------------- |
| Value is required at construction time | Value can be set after construction |
| Property is immutable after creation | Property is mutable |
| Creating geometries with dimensions | Setting position, rotation, scale |
| Setting material options at creation | Changing colors or values dynamically |
```vue
```
## Reactive Args
The `args` prop is reactive. When `args` changes, TresJS will **recreate the Three.js instance** with the new constructor arguments:
```vue
```
::warning
Recreating instances can be expensive. For frequently changing values, prefer using props or template refs instead of reactive `args`.
::
## Key Takeaways
::card-group
:::card{icon="i-lucide-list" title="Array Format"}
`args` always accepts an array, even for single arguments or options objects.
:::
:::card{icon="i-lucide-arrow-right" title="Order Matters"}
Arguments must match the Three.js constructor signature exactly.
:::
:::card{icon="i-lucide-refresh-cw" title="Reactivity"}
Changing `args` recreates the instance - use sparingly for performance.
:::
:::card{icon="i-lucide-book-open" title="Check the Docs"}
Reference [Three.js documentation](https://threejs.org/docs/){rel=""nofollow""} for constructor signatures.
:::
::
# Declarative Properties
## From Imperative to Declarative
In vanilla Three.js, you set properties imperatively:
```js
const mesh = new THREE.Mesh(geometry, material)
mesh.position.set(1, 2, 3)
mesh.rotation.set(0, Math.PI, 0)
mesh.visible = true
mesh.castShadow = true
```
TresJS lets you declare these properties directly on components:
```vue
```
:video-accordion{start-time="445" title="Watch this video from Alvarosabu about the TresJS core principles" video-id="XsXfF9-qe60"}
## Property Mapping Rules
TresJS automatically maps props to Three.js properties using these conventions:
### 1. Direct Properties
Props map directly to properties of the same name:
```vue
```
### 2. Properties with `.set()` Methods
When a property has a `.set()` method (like `Vector3`, `Euler`, `Color`), TresJS automatically calls it with array values:
```vue
```
### 3. Scalar Shorthand
For uniform scaling, pass a single number:
```vue
```
### 4. kebab-case Conversion
Vue's kebab-case props are converted to camelCase properties:
```vue
```
## Pierced Props (Nested Properties)
TresJS supports setting nested properties using dash notation:
### Transform Axes
```vue
```
### Color Channels
```vue
```
### Deep Nesting
```vue
```
## Special Props
### `lookAt`
The `lookAt` prop calls the object's `.lookAt()` method:
```vue
```
### `attach`
Controls how children attach to parents (used for geometries and materials):
```vue
```
::tip
Geometries and materials auto-attach - you rarely need to specify `attach` manually.
::
## Reactivity
All props are reactive by default. When a prop value changes, TresJS updates the Three.js property:
```vue
```
::warning
For high-frequency updates (animations at 60fps), use template refs instead of reactive props. See [Reactivity](https://docs.tresjs.org/essentials/concepts/reactivity) for performance patterns.
::
## Common Patterns
### Complete Mesh Example
```vue
```
### Light with Shadows
```vue
```
## Key Takeaways
::card-group
:::card{icon="i-lucide-move-3d" title="Array for Vectors"}
Use arrays for position, rotation, scale - TresJS calls `.set()` automatically.
:::
:::card{icon="i-lucide-git-branch" title="Pierced Props"}
Access nested properties with dash notation: `:position-x`, `:shadow-camera-near`.
:::
:::card{icon="i-lucide-repeat" title="Auto Conversion"}
kebab-case props convert to camelCase Three.js properties automatically.
:::
:::card{icon="i-lucide-refresh-cw" title="Reactive by Default"}
Props update Three.js properties reactively - be mindful of performance.
:::
::
# Extending the Catalogue
## The TresJS Catalogue
TresJS automatically generates Vue components for all classes exported from the `three` package. This **catalogue** maps component names to Three.js constructors:
| Component | Three.js Class |
| --------------------------- | ------------------------- |
| `` | `THREE.Mesh` |
| `` | `THREE.BoxGeometry` |
| `` | `THREE.PerspectiveCamera` |
But Three.js has many useful classes in `three/addons/` that aren't included by default, plus third-party libraries you might want to use.
## The `extend` Function
The `extend` function adds new classes to the catalogue, making them available as Tres components:
```ts
import { extend } from '@tresjs/core'
import { TextGeometry } from 'three/addons/geometries/TextGeometry'
// Add to catalogue
extend({ TextGeometry })
// Now available as
```
## Common Extensions
### Controls
```vue
```
::note
Controls such as Three.js' `OrbitControls` require the active camera and renderer DOM element as constructor arguments. Prefer the `@tresjs/cientos` component shown above, which reads both from the canvas context. If you extend a control class directly, wrap it in a component rendered inside `` and pass those values through the [`args` prop](https://docs.tresjs.org/essentials/concepts/constructor-arguments).
::
To extend the Three.js class directly, create a child component such as `ExtendedOrbitControls.vue`:
```vue
```
Render that component as a child of `` so `useTres()` can access the canvas context.
### Geometries
```vue
```
### Loaders
```vue
```
### Post-Processing
```vue
```
::tip
For post-processing, consider using [@tresjs/post-processing](https://github.com/Tresjs/post-processing){rel=""nofollow""} which provides ready-to-use effect components.
::
## Third-Party Libraries
### Using drei-style Libraries
```vue
```
### Custom Classes
You can extend with your own Three.js classes:
```vue
```
## Naming Convention
The component name is derived from the class name you provide to `extend`:
```ts
extend({ RoundedBoxGeometry }) //
extend({ TextGeometry }) //
extend({ MyCustomMaterial }) //
```
You can also use custom names:
```ts
extend({
CustomGeometry: RoundedBoxGeometry //
})
```
## Global vs Local Extension
### Global Extension (Recommended for Shared Classes)
Extend in your main app entry or a plugin:
```ts
// plugins/tres.ts or main.ts
import { extend } from '@tresjs/core'
import { RoundedBoxGeometry } from 'three/addons/geometries/RoundedBoxGeometry'
import { TextGeometry } from 'three/addons/geometries/TextGeometry'
extend({ RoundedBoxGeometry, TextGeometry })
```
### Local Extension (Component-Specific)
Extend in the component that needs it:
```vue
```
## TypeScript Support
For type safety with extended components, declare the types:
```ts
// types/tres.d.ts
import type { RoundedBoxGeometry } from 'three/addons/geometries/RoundedBoxGeometry'
declare module '@tresjs/core' {
interface TresObjectMap {
RoundedBoxGeometry: typeof RoundedBoxGeometry
}
}
```
## Complete Example
```vue
```
## Key Takeaways
::card-group
:::card{icon="i-lucide-plus-circle" title="extend() Function"}
Use `extend()` to add any Three.js class to the TresJS catalogue.
:::
:::card{icon="i-lucide-package" title="Addons Support"}
Classes from `three/addons/` aren't included by default - extend them as needed.
:::
:::card{icon="i-lucide-code" title="Custom Classes"}
Your own Three.js classes can be extended and used as Vue components.
:::
:::card{icon="i-lucide-tag" title="Tres Prefix"}
Extended classes become available with the `Tres` prefix: `TextGeometry` → ``.
:::
::
# Child Attachments
## Not Vue Slots
When you nest components in TresJS:
```vue
```
This looks like Vue slots, but it isn't. TresJS uses a **custom Vue renderer** — there is no DOM, no ``. Instead, the renderer intercepts each child component and **attaches it as a property** of the parent Three.js object.
The equivalent vanilla Three.js code is:
```js
const geometry = new THREE.BoxGeometry()
const material = new THREE.MeshBasicMaterial({ color: 'red' })
const mesh = new THREE.Mesh(geometry, material)
```
::tip
You cannot use `v-slot`, named slots, or scoped slots with TresJS scene components. Child attachment is handled at the renderer level, not Vue's component system.
::
:video-accordion{start-time="619" title="Watch this video from Alvarosabu about child attachments in TresJS" video-id="XsXfF9-qe60"}
## How Auto-Attachment Works
TresJS inspects the type of each child and automatically decides how to attach it:
| Child type | Attachment |
| ------------------------- | ------------------------- |
| `BufferGeometry` subclass | `parent.geometry = child` |
| `Material` subclass | `parent.material = child` |
| `Object3D` subclass | `parent.add(child)` |
This means in most cases you don't need to think about it — just nest the component and TresJS does the right thing.
## The `attach` Prop
For cases where auto-attachment isn't enough, use the `attach` prop to explicitly specify the target property:
```vue
```
This is particularly useful with objects that don't follow the standard `Mesh` pattern:
```vue
```
Or for attaching to nested properties:
```vue
```
::tip
Geometries and materials auto-attach correctly in the vast majority of cases. You only need `attach` for unusual object types or custom property targets.
::
## Scene Graph Children
When a child is an `Object3D` subclass (meshes, lights, groups, cameras), TresJS calls `parent.add(child)` to insert it into the Three.js scene graph. This is how nesting translates to scene hierarchy:
```vue
```
Moving or rotating the `` affects all children, exactly as in Three.js.
## Multiple Materials
Some Three.js objects accept an array of materials. Pass multiple materials using `attach` with array index notation:
```vue
```
## Key Takeaways
::card-group
:::card{icon="i-lucide-x-circle" title="Not Vue Slots"}
Children are attached via the custom renderer, not Vue's slot system. `v-slot` and named slots don't apply.
:::
:::card{icon="i-lucide-zap" title="Auto-Attachment"}
Geometries attach as `.geometry`, materials as `.material`, Object3Ds via `.add()` — all automatically.
:::
:::card{icon="i-lucide-link" title="The `attach` Prop"}
Explicitly target any property when auto-attachment doesn't cover your use case.
:::
:::card{icon="i-lucide-git-branch" title="Scene Hierarchy"}
Nesting Object3D children mirrors the Three.js scene graph — transforms propagate down the tree.
:::
::
# Essentials
#
## Component Overview
`` creates the necessary Three.js environment and bridges the gap between Vue's reactivity system and Three.js's imperative rendering approach. It is responsible for:
- Creating and configuring the WebGL canvas element
- Setting up the Three.js scene, camera, and renderer
- Establishing the render loop
- Providing the shared context to all child components
- Handling user events through a comprehensive event system
- Managing memory and disposal of Three.js objects
## Usage
```vue [app.vue]
```
## Canvas Size
The `` component offers flexible sizing options to fit different layout requirements. Understanding how canvas sizing works is crucial for creating responsive 3D experiences.
### Default Behavior: Parent Element Size
By default, `` automatically adapts to its **parent element's dimensions**. This is the most common and recommended approach as it integrates seamlessly with your existing CSS layout.
```vue [parent-sized.vue]
```
### Full Window Size
For immersive full-screen 3D experiences, use the `window-size` prop to make the canvas fill the entire browser viewport:
```vue [fullscreen.vue]
```
## API
::warning
**Not all props are reactive!** Some props are WebGL context options that are passed to the renderer constructor and **cannot be changed** after the canvas is created. Changing these props would require recreating the entire renderer and canvas context.
For detailed technical information about prop reactivity, see [GitHub Issue #982](https://github.com/Tresjs/tres/issues/982){rel=""nofollow""}.
::
### Props
::field-group
:::field{name="alpha" type="boolean"}
**🔒 WebGL Context Option** - Controls the default clear alpha value. When set to `true`, the value is 0. Otherwise it's 1. Enables transparency in the canvas.
:::
:::field{name="antialias" type="boolean"}
**🔒 WebGL Context Option** - Default: `true` - Whether to perform antialiasing. Improves visual quality by smoothing jagged edges.
:::
:::field{name="camera" type="TresCamera"}
Custom camera instance to use as main camera. If not provided, a default PerspectiveCamera will be created.
:::
:::field{name="clearAlpha" type="number"}
**⚡ Reactive** - Default: `1` - The alpha (transparency) value used when clearing the canvas. Range from 0 (transparent) to 1 (opaque).
:::
:::field{name="clearColor" type="string"}
**⚡ Reactive** - Default: `"#000000"` - The color the renderer will use to clear the canvas. Can be any valid CSS color string.
:::
:::field{name="depth" type="boolean"}
**🔒 WebGL Context Option** - Whether the drawing buffer has a depth buffer of at least 16 bits. Required for depth testing and 3D rendering.
:::
:::field{name="dpr" type="number | [number, number]"}
**⚡ Reactive** - Device Pixel Ratio for the renderer. Can be a single number or a tuple defining a range [min, max]. Controls rendering resolution relative to device pixels.
:::
:::field{name="enableProvideBridge" type="boolean"}
Default: `true` - Whether to enable the provide/inject bridge between Vue and TresJS. When true, Vue's provide/inject will work across the TresJS boundary.
:::
:::field{name="failIfMajorPerformanceCaveat" type="boolean"}
**🔒 WebGL Context Option** - Whether the renderer creation will fail upon low performance detection. See WebGL spec for details.
:::
:::field{name="fpsLimit" type="number"}
**⚡ Reactive** - Default: `undefined` (unlimited) - Caps the render loop frequency in FPS. Useful for reducing CPU/GPU usage or matching a target update rate.
:::
:::field{name="logarithmicDepthBuffer" type="boolean"}
**🔒 WebGL Context Option** - Whether to use a logarithmic depth buffer. May be necessary for huge differences in scale. Can cause performance decrease.
:::
:::field{name="preserveDrawingBuffer" type="boolean"}
**🔒 WebGL Context Option** - Whether to preserve the buffers until manually cleared or overwritten. Required for screenshots or canvas-to-image conversion.
:::
:::field{name="renderer" type="(ctx: TresRendererSetupContext) => TresRenderer"}
Custom [WebGL](https://threejs.org/docs/#api/en/renderers/WebGLRenderer){rel=""nofollow""} or experimental **WebGPU** renderer instance. Allows using a pre-configured renderer instead of creating a new one. Useful for advanced renderer customization.
::::note
To see how to use the WebGPU renderer, check the example here: **[WebGPU](https://docs.tresjs.org/api/advanced/web-gpu)**.
::::
:::
:::field{name="renderMode" type="'always' | 'on-demand' | 'manual'"}
Default: `"always"` - Controls when the scene renders:
- `always` - Renders every frame continuously
- `on-demand` - Renders only when changes are detected
- `manual` - Requires explicit render calls
:::
:::field{name="shadows" type="boolean"}
**⚡ Reactive** - Enable shadow mapping in the renderer. Required for casting and receiving shadows in your 3D scene.
:::
:::field{name="shadowMapType" type="ShadowMapType"}
**⚡ Reactive** - Default: `PCFShadowMap` (on WebGPU with three.js before r186, `PCFSoftShadowMap`) - The type of shadow map to use:
- `BasicShadowMap` - Basic shadow mapping (fastest, lowest quality)
- `PCFShadowMap` - Percentage-Closer Filtering shadows (good quality/performance balance). Soft on WebGPU since r186.
- `PCFSoftShadowMap` - Deprecated. three falls back to `PCFShadowMap` and logs a warning on WebGL, and on WebGPU since r186.
- `VSMShadowMap` - Variance Shadow Maps (advanced technique)
:::
:::field{name="stencil" type="boolean"}
**🔒 WebGL Context Option** - Whether the drawing buffer has a stencil buffer of at least 8 bits. Used for advanced rendering techniques.
:::
:::field{name="toneMapping" type="ToneMapping"}
**⚡ Reactive** - Default: `ACESFilmicToneMapping` - Defines the tone mapping algorithm used by the renderer:
- `NoToneMapping` - No tone mapping applied
- `LinearToneMapping` - Linear tone mapping
- `ReinhardToneMapping` - Reinhard tone mapping
- `CineonToneMapping` - Cineon tone mapping
- `ACESFilmicToneMapping` - ACES Filmic tone mapping (recommended)
- `CustomToneMapping` - Custom tone mapping
:::
:::field{name="toneMappingExposure" type="number"}
**⚡ Reactive** - Default: `1` - Exposure level of tone mapping. Controls the brightness/exposure of the rendered image.
:::
:::field{name="outputColorSpace" type="ColorSpace"}
**⚡ Reactive** - Color space for the output render. Controls how colors are displayed on screen.
:::
:::field{name="useLegacyLights" type="boolean"}
**🔒 WebGL Context Option** - Whether to use the legacy lighting mode. When false, uses physically correct lighting calculations.
:::
:::field{name="windowSize" type="boolean"}
**⚡ Reactive** - Whether the canvas should be sized to the window. When true, canvas will be fixed positioned and full viewport size.
:::
:::field{name="customRendererOptions" type="TresCustomRendererOptions"}
Configuration options for the TresJS custom renderer:
- `primitivePrefix` - Custom prefix for the primitive component name (default: `""`). For example, setting this to `"my"` allows you to use `` instead of ``.
::::code-group
```vue [Custom Prefix]
```
```vue [Default (No Prefix)]
```
::::
:::
::
### Events
::field-group
:::field{name="ready" type="(context: TresContext) => void"}
Emitted when the TresJS context is fully initialized and ready to use. Provides access to the complete context object.
:::
:::field{name="render" type="(context: TresContext) => void"}
Emitted on every frame render. Useful for custom render logic or performance monitoring.
:::
:::field{name="beforeLoop" type="(context: TresContextWithClock) => void"}
Emitted before each render loop iteration. Includes clock information for time-based animations.
:::
:::field{name="loop" type="(context: TresContextWithClock) => void"}
Emitted during each render loop iteration. Perfect for custom animation logic.
:::
:::field{name="pointermissed" type="(event: PointerEvent) => void"}
Emitted when a pointer event doesn't hit any 3D objects in the scene. Useful for deselecting objects or closing menus.
:::
:::field{name="pointerover" type="(event: PointerEvent) => void"}
Emitted when the pointer moves over a 3D object. Supports event bubbling from child objects.
:::
:::field{name="pointerout" type="(event: PointerEvent) => void"}
Emitted when the pointer moves out of a 3D object. Supports event bubbling from child objects.
:::
:::field{name="pointerenter" type="(event: PointerEvent) => void"}
Emitted when the pointer enters a 3D object. Does not bubble from child objects.
:::
:::field{name="pointerleave" type="(event: PointerEvent) => void"}
Emitted when the pointer leaves a 3D object. Does not bubble from child objects.
:::
:::field{name="pointerdown" type="(event: PointerEvent) => void"}
Emitted when a pointer button is pressed down over a 3D object.
:::
:::field{name="pointerup" type="(event: PointerEvent) => void"}
Emitted when a pointer button is released over a 3D object.
:::
:::field{name="click" type="(event: PointerEvent) => void"}
Emitted when a 3D object is clicked. Equivalent to pointerdown followed by pointerup.
:::
::
### Exposed Properties
::field-group
:::field{name="context" type="TresContext | undefined"}
The complete TresJS context object containing scene, renderer, camera, and other core instances. Available after the component is mounted.
:::
:::field{name="dispose" type="() => void"}
Method to manually dispose of the WebGL context and clean up resources. Useful for cleanup when dynamically removing canvas instances.
:::
::
#
## Component Overview
`` is the internal component that powers ``. It mounts the TresJS renderer and scene using a **provided canvas element** instead of creating one for you.
::note
This component is exported for advanced use cases only. In most apps you should keep using ``.
::
## When to Use It
Use `` only if you already own the WebGL canvas (or must integrate with a host framework that provides one) and you still want TresJS to manage the Three.js scene, render loop, and events.
## Usage
```vue [app.vue]
```
## Notes
- You must pass a valid `canvas` element.
- Canvas sizing and styling are **your** responsibility.
- Props and events match ``, so you can reuse the same API surface.
# Tres Components
## The Autogenerated Catalogue
TresJS provides an **autogenerated catalogue** of Vue components that map directly to Three.js classes. Any class exported from the `three` package is automatically available as a Vue component with the `Tres` prefix.
### Naming Convention
| Vue Component | Three.js Class |
| --------------------------- | --------------------------------------------------------------------------------------------------------------------------- |
| `` | [`new THREE.PerspectiveCamera()`](https://threejs.org/docs/#api/en/cameras/PerspectiveCamera){rel=""nofollow""} |
| `` | [`new THREE.Mesh()`](https://threejs.org/docs/#api/en/objects/Mesh){rel=""nofollow""} |
| `` | [`new THREE.BoxGeometry()`](https://threejs.org/docs/#api/en/geometries/BoxGeometry){rel=""nofollow""} |
| `` | [`new THREE.MeshBasicMaterial()`](https://threejs.org/docs/#api/en/materials/MeshBasicMaterial){rel=""nofollow""} |
| `` | [`new THREE.AmbientLight()`](https://threejs.org/docs/#api/en/lights/AmbientLight){rel=""nofollow""} |
### No Imports Needed
Unlike vanilla Three.js where you must import each class:
```js
import { PerspectiveCamera, Mesh, BoxGeometry } from 'three'
```
With TresJS, components are available automatically:
```vue
```
:video-accordion{start-time="334" title="Watch this video from Alvarosabu about the TresJS core principles" video-id="XsXfF9-qe60"}
::tip
Since TresJS components map directly to Three.js classes, you can use the [Three.js documentation](https://threejs.org/docs/){rel=""nofollow""} as your API reference for constructor arguments and properties.
::
## Working with Tres Components
TresJS components accept two types of configuration:
### Constructor Arguments (`args`)
Pass arguments to the Three.js constructor using the `args` prop:
```vue
```
:read-more{title="Learn more about constructor arguments" to="https://docs.tresjs.org/essentials/concepts/constructor-arguments"}
### Declarative Properties
Set Three.js object properties using Vue props:
```vue
```
:read-more{title="Learn more about declarative properties" to="https://docs.tresjs.org/essentials/concepts/declarative-properties"}
### Child Attachments
Nesting components inside others is how you compose Three.js objects in TresJS. This is **not** Vue's slot system — TresJS's custom renderer intercepts children and attaches them as properties of the parent Three.js object:
```vue
```
`Object3D` children (meshes, lights, groups) are added via `.add()` and become part of the scene graph hierarchy.
:read-more{title="Learn more about child attachments" to="https://docs.tresjs.org/essentials/concepts/child-attachments"}
### Extending the Catalogue
Add Three.js addons or custom classes using `extend()`:
```vue {2-5,11}
```
:read-more{title="Learn more about extending the catalogue" to="https://docs.tresjs.org/essentials/concepts/extending-catalogue"}
# TresPortal
`` reparents its declarative children into a target `Object3D` (often a separate `Scene`) instead of the surrounding scene graph. It is a thin wrapper over Vue's built-in ``, so children remain fully reactive — adding, removing, or updating them works as usual.
It is the building block behind [`MeshPortalMaterial`](https://cientos.tresjs.org/api/materials/mesh-portal-material){rel=""nofollow""} in `@tresjs/cientos`.
:examples-portal
## Usage
```vue
```
## Props
| Prop | Type | Default | Description |
| ---------- | ---------- | ------- | -------------------------------------------------------- |
| `to` | `Object3D` | — | Target object/scene to reparent children into. Required. |
| `disabled` | `boolean` | `false` | When `true`, children render in place (main scene). |
::note
`` only handles **structural** reparenting — children are added to the target via `nodeOps`, and the target is also where `attach` resolves. So `` or `` inside a portal set the **target** scene's properties.
By itself it does **not** override the injected scene context: children's `useTres().scene` still returns the main scene, so imperative helpers like the cientos `` component would target the main scene. A consumer can add this by `provide()`-ing a context whose `scene` is the target — `provide`/`inject` follows the mounted tree, so it reaches the portal's slot children through the ``. `MeshPortalMaterial` does exactly this, which is why `` works inside it. Rendering the target scene (e.g. to a texture) is also the consumer's responsibility — `MeshPortalMaterial` does that via an FBO.
::
# TresJS API Reference
::card-group
:::card
---
spotlight: true
icon: i-lucide-box
title: Components
to: https://docs.tresjs.org/api/components/tres-canvas
---
Explore the TresJS components.
:::
:::card
---
spotlight: true
icon: i-lucide-arrow-right-left
title: Composables
to: https://docs.tresjs.org/api/composables/use-tres
---
Discover TresJS composables for context access, loading resources, animation and more.
:::
:::card
---
spotlight: true
icon: i-lucide-brain-circuit
title: Advanced
to: https://docs.tresjs.org/api/advanced/primitives
---
Go a step further with advanced topics like performance optimization and more.
:::
::
# useTres
The `useTres` composable provides convenient access to a simplified TresJS context with direct access to core properties like the scene, renderer, camera, and utility functions. It's designed to be more straightforward than `useTresContext` while still providing access to essential TresJS functionality.
## Usage
::warning
`useTres` can only be used in child components of a [`TresCanvas`](https://docs.tresjs.org/api/components/tres-canvas) component, as its data is provided by [`TresCanvas`](https://docs.tresjs.org/api/components/tres-canvas).
::
```ts
import { useTres } from '@tresjs/core'
const { scene, renderer, camera, sizes, invalidate, advance } = useTres()
// Access the active camera
console.log('Current camera:', camera.value)
// Get canvas dimensions
console.log('Canvas size:', sizes.width.value, sizes.height.value)
// Trigger a re-render in on-demand mode
invalidate()
```
### Basic Example
::code-group
```vue [MyComponent.vue]
```
```vue [App.vue]
```
::
### Extending the Catalogue
Use the `extend` function to add custom Three.js objects to the TresJS catalogue:
```vue
```
:read-more{to="https://docs.tresjs.org/api/components/tres-objects#extending-the-catalogue"}
### Manual Rendering Control
For precise control over when frames are rendered:
```vue
```
## Properties
The `useTres` composable returns an object with the following properties:
::field-group
:::field{name="scene" type="ShallowRef"}
The Three.js scene object containing all 3D objects in your scene.
:::
:::field{name="renderer" type="TresRenderer"}
The Three.js WebGL renderer instance. Direct access to renderer methods and properties.
:::
:::field{name="camera" type="ComputedRef"}
The currently active camera in the scene. Reactive reference that updates when the active camera changes.
:::
:::field{name="sizes" type="SizesType"}
Reactive size information including canvas width, height, aspect ratio, and pixel ratio.
:::
:::field{name="controls" type="Ref"}
Reference to the current camera controls instance (e.g., OrbitControls, FlyControls).
:::
:::field{name="extend" type="(objects: any) => void"}
Function to extend the TresJS component catalogue with custom Three.js objects.
:::
:::field{name="events" type="EventManager"}
The event manager instance for handling pointer interactions with 3D objects.
:::
:::field{name="invalidate" type="() => void"}
Function to mark the scene as needing an update in the next frame. Essential for on-demand rendering mode.
:::
:::field{name="advance" type="() => void"}
Function to manually advance the render loop by one frame. Required for manual rendering mode.
:::
::
## Practical Examples
### Responsive Camera Setup
```vue
```
### Custom Render Pipeline
```vue
```
### Dynamic Scene Management
```vue
```
## Difference from useTresContext
`useTres` provides a simplified interface compared to `useTresContext`:
| Feature | useTres | useTresContext |
| -------------- | ------------------------------ | ------------------------------------------ |
| **Renderer** | Direct `TresRenderer` instance | Renderer manager with additional methods |
| **Camera** | Active camera reference | Full camera management system |
| **Complexity** | Simplified, focused API | Complete context with all internal details |
| **Use Case** | Most common scenarios | Advanced use cases, internal operations |
::tip
**Developer Tip:**
Choose `useTres` for typical 3D scene interactions, and `useTresContext` when you need access to the complete internal context.
::
## Type
```ts [Signature]
function useTres(): TresPartialContext
interface TresPartialContext {
/** The Three.js scene object containing all 3D objects */
scene: ShallowRef
/** The Three.js WebGL renderer instance */
renderer: TresRenderer
/** The currently active camera */
camera: ComputedRef
/** Reactive size information for the canvas */
sizes: SizesType
/** Reference to current camera controls */
controls: Ref
/** TresJS extension function for adding custom objects */
extend: (objects: any) => void
/** Event manager for pointer interactions */
events: EventManager
/** Mark scene for re-render in on-demand mode */
invalidate: () => void
/** Manually advance one frame in manual mode */
advance: () => void
}
interface SizesType {
/** Canvas width in pixels */
width: Ref
/** Canvas height in pixels */
height: Ref
/** Canvas aspect ratio (width / height) */
aspectRatio: Ref
/** Device pixel ratio */
pixelRatio: Ref
}
type TresRenderer = WebGLRenderer | Renderer
type TresControl = any // Camera controls instance
type EventManager = any // Event manager instance
```
# useTresContext
The `useTresContext` composable provides complete access to the full TresJS context with all internal management systems, including advanced camera management, renderer control, and event handling. It's designed for advanced use cases where you need direct access to all TresJS internals.
## Usage
::warning
`useTresContext` can only be used in child components of a [`TresCanvas`](https://docs.tresjs.org/api/components/tres-canvas) component, as its data is provided by [`TresCanvas`](https://docs.tresjs.org/api/components/tres-canvas).
::
```ts
import { useTresContext } from '@tresjs/core'
const { scene, renderer, camera, sizes, events } = useTresContext()
// Access the camera management system
console.log('Active camera:', camera.activeCamera.value)
console.log('All cameras:', camera.cameras.value)
// Access the complete renderer manager
console.log('Render mode:', renderer.mode)
console.log('Can invalidate:', renderer.canBeInvalidated.value)
// Register a new camera
const myCamera = new PerspectiveCamera(75, 1, 0.1, 1000)
camera.registerCamera(myCamera, true) // Set as active
```
### Advanced Camera Management
::code-group
```vue [CameraController.vue]
```
```vue [App.vue]
```
::
### Advanced Renderer Control
Use the full renderer manager for sophisticated rendering control:
```vue
```
### Event System Integration
Access the complete event management system:
```vue
```
### Custom Renderer Setup
For complete control over renderer initialization:
```vue
```
## Properties
The `useTresContext` composable returns the complete TresJS context with the following properties:
::field-group
:::field{name="scene" type="ShallowRef"}
The Three.js scene object containing all 3D objects in your scene.
:::
:::field{name="sizes" type="SizesType"}
Reactive size information including canvas width, height, aspect ratio, and pixel ratio.
:::
:::field{name="extend" type="(objects: any) => void"}
Function to extend the TresJS component catalogue with custom Three.js objects.
:::
:::field{name="camera" type="UseCameraReturn"}
Complete camera management system with registration, deregistration, and active camera control.
:::
:::field{name="controls" type="Ref"}
Reference to the current camera controls instance (e.g., OrbitControls, FlyControls).
:::
:::field{name="renderer" type="UseRendererManagerReturn"}
Complete renderer management system with advanced rendering control, frame management, and event hooks.
:::
:::field{name="events" type="EventManager"}
Complete event management system for handling pointer interactions and global events.
:::
::
### Camera Management System (`camera`)
::field-group
:::field{name="activeCamera" type="ComputedRef"}
The currently active camera in the scene. Always guaranteed to exist.
:::
:::field{name="cameras" type="Ref"}
Array of all registered cameras in the scene.
:::
:::field
---
name: registerCamera
type: "(camera: TresCamera, active?: boolean) => void"
---
Register a new camera in the scene. Optionally set it as the active camera.
:::
:::field{name="deregisterCamera" type="(camera: TresCamera) => void"}
Remove a camera from the scene management system.
:::
:::field
---
name: setActiveCamera
type: "(cameraOrUuid: string | TresCamera) => void"
---
Set a specific camera as the active one using camera instance or UUID.
:::
::
### Renderer Management System (`renderer`)
::field-group
:::field{name="instance" type="TresRenderer"}
The raw Three.js WebGL renderer instance.
:::
:::field{name="loop" type="RafLoop"}
The render loop system with start, stop, and event hooks.
:::
:::field{name="advance" type="() => void"}
Manually advance one frame in manual render mode.
:::
:::field{name="invalidate" type="(frames?: number) => void"}
Mark the scene for re-rendering in on-demand mode. Optional frame count parameter.
:::
:::field{name="canBeInvalidated" type="ComputedRef"}
Whether the renderer can currently be invalidated (on-demand mode only).
:::
:::field{name="mode" type="RenderMode"}
Current render mode: 'always', 'on-demand', or 'manual'.
:::
:::field
---
name: onReady
type: "(callback: (renderer: TresRenderer) => void) => void"
---
Register a callback for when the renderer is fully initialized.
:::
:::field
---
name: onRender
type: "(callback: (renderer: TresRenderer) => void) => void"
---
Register a callback that fires after each frame is rendered.
:::
:::field{name="replaceRenderFunction" type="(fn: RenderFunction) => void"}
Take complete control over the rendering process with a custom render function.
:::
::
## Difference from useTres
`useTresContext` provides complete access to all TresJS internals compared to the simplified [`useTres`](https://docs.tresjs.org/api/composables/use-tres) interface.
| Feature | useTresContext | useTres |
| ----------------------- | ----------------------------------------------------------- | --------------------------------- |
| **Renderer** | Complete renderer manager with advanced controls | Direct renderer instance only |
| **Camera** | Full camera management system with registration/switching | Active camera reference only |
| **Complexity** | Complete internal access, all management features | Simplified, focused API |
| **Use Case** | Advanced scenarios, plugin development, internal operations | Most common 3D scene interactions |
| **Performance Control** | Fine-grained frame control, custom render functions | Basic invalidate/advance only |
| **Event Handling** | Complete event management system | Basic event manager access |
::tip
**Developer Tip:**
Choose `useTresContext` for advanced 3D applications, plugin development, or when you need complete control over the rendering pipeline. Use [`useTres`](https://docs.tresjs.org/api/composables/use-tres) for typical 3D scene interactions.
::
## Type
```ts [Signature]
function useTresContext(): TresContext
interface TresContext {
/** The Three.js scene object containing all 3D objects */
scene: ShallowRef
/** Reactive size information for the canvas */
sizes: SizesType
/** TresJS extension function for adding custom objects */
extend: (objects: any) => void
/** Complete camera management system */
camera: UseCameraReturn
/** Reference to current camera controls */
controls: Ref
/** Complete renderer management system */
renderer: UseRendererManagerReturn
/** Complete event management system */
events: EventManager
}
interface UseCameraReturn {
/** The currently active camera */
activeCamera: ComputedRef
/** Array of all registered cameras */
cameras: Ref
/** Register a new camera */
registerCamera: (camera: TresCamera, active?: boolean) => void
/** Remove a camera from management */
deregisterCamera: (camera: TresCamera) => void
/** Set a specific camera as active */
setActiveCamera: (cameraOrUuid: string | TresCamera) => void
}
interface UseRendererManagerReturn {
/** The render loop system */
loop: RafLoop
/** The raw Three.js renderer instance */
instance: TresRenderer
/** Manually advance one frame (manual mode) */
advance: () => void
/** Register callback for renderer ready event */
onReady: (callback: (renderer: TresRenderer) => void) => void
/** Register callback for after render event */
onRender: (callback: (renderer: TresRenderer) => void) => void
/** Mark scene for re-render (on-demand mode) */
invalidate: (frames?: number) => void
/** Whether renderer can be invalidated */
canBeInvalidated: ComputedRef
/** Current render mode */
mode: RenderMode
/** Take control of render function */
replaceRenderFunction: (fn: RenderFunction) => void
}
interface SizesType {
/** Canvas width in pixels */
width: Ref
/** Canvas height in pixels */
height: Ref
/** Canvas aspect ratio (width / height) */
aspectRatio: Ref
/** Device pixel ratio */
pixelRatio: Ref
}
type RenderMode = 'always' | 'on-demand' | 'manual'
type RenderFunction = (notifySuccess: () => void) => void
type TresRenderer = WebGLRenderer | Renderer
type TresCamera = Camera
```
# useLoop
The `useLoop` composable allows you to register callbacks that run before and after each render cycle, or take complete control of the rendering process within `TresCanvas` components.
::dotted-diagram
:diagrams-render-loop
::
## Usage
::warning
`useLoop` can only be used in child components of a [`TresCanvas`](https://docs.tresjs.org/api/components/tres-canvas) component, as its data is provided by [`TresCanvas`](https://docs.tresjs.org/api/components/tres-canvas).
::
```ts
import { useLoop } from '@tresjs/core'
const { onBeforeRender, onRender } = useLoop()
onBeforeRender(() => {
console.log('before render')
})
onRender(() => {
console.log('after render')
})
```
### Priority
The `onBeforeRender` and `onRender` callbacks can be registered with a priority. The priority is a number that determines the order in which the callbacks are executed. The default priority is 0.
::code-group
```ts [onBeforeRender]
onBeforeRender(() => {
console.log('earlier before render')
}, -10)
onBeforeRender(() => {
console.log('just before render')
})
onBeforeRender(() => {
console.log('even closer before render')
}, 10)
```
```ts [onRender]
onRender(() => {
console.log('even closer after render')
}, -10)
onRender(() => {
console.log('just after render')
})
onRender(() => {
console.log('later after render')
}, 10)
```
::
### Register update callbacks
The most common use of `onBeforeRender` is to register update callbacks for animations, such as rotating or moving objects in the scene.
::code-group
```vue [AnimatedCube.vue]
```
```vue [App.vue]
```
::
### Take Over the Render Loop
You can take complete control of the rendering process by using the `render` method from `useLoop`. This allows you to implement custom rendering logic, post-processing effects, or conditional rendering.
```ts
import { useLoop, useTresContext } from '@tresjs/core'
const { render } = useLoop()
const { renderer, scene, camera } = useTresContext()
// Take over the render loop with custom logic
render((notifySuccess) => {
// Your custom rendering logic here
if (camera.activeCamera.value) {
renderer.instance.render(scene.value, camera.activeCamera.value)
// IMPORTANT: Call notifySuccess() to indicate the frame was rendered successfully
notifySuccess()
}
})
```
::warning
**Success Callback Required**: You must call the provided callback (named `notifySuccess()` in the example above) to properly notify the render loop that the frame was completed. This is essential for the render modes (`always`, `on-demand`, `manual`) to function correctly.
::
#### Custom Rendering Examples
Here are examples showing different custom rendering scenarios:
::code-group
```vue [Conditional Rendering]
```
```vue [Post-processing]
```
```vue [Multi-pass Rendering]
```
::
::warning
When you take over the render loop, you become responsible for:
- Manually triggering a render
- **Always calling `notifySuccess()` at the end of your render function**
- Handling conditional rendering logic yourself
- Managing any post-processing effects
- Ensuring proper frame timing and performance
The built-in render modes (`always`, `on-demand`, `manual`) will be bypassed when using custom rendering.
::
## Callback Parameters
Both `onBeforeRender` and `onRender` callbacks receive a context object containing timing information and access to the TresJS context:
```ts
onBeforeRender(({ delta, elapsed, renderer, camera, scene, sizes, invalidate, advance }) => {
// Timing information
console.log('Time since last frame:', delta) // in seconds
console.log('Total elapsed time:', elapsed) // in seconds
// TresJS context access
console.log('Current camera:', camera.value)
console.log('Scene:', scene.value)
console.log('Canvas size:', sizes.width.value, sizes.height.value)
// Control methods
invalidate() // Mark scene for re-render (useful in on-demand mode)
advance() // Manually advance one frame (useful in manual mode)
})
```
### `onBeforeRender` and `onRender` Parameters
::field-group
:::field{name="delta" type="number"}
Time in seconds since the last frame. Perfect for frame-rate independent animations.
:::
:::field{name="elapsed" type="number"}
Total elapsed time in seconds since the render loop started. Useful for time-based effects.
:::
:::field{name="renderer" type="TresRenderer"}
The Three.js WebGL renderer instance. Access to all renderer methods and properties.
:::
:::field{name="camera" type="ComputedRef"}
The currently active camera in the scene. Reactive reference that updates when camera changes.
:::
:::field{name="scene" type="ShallowRef"}
The Three.js scene object containing all 3D objects.
:::
:::field{name="sizes" type="SizesType"}
Reactive size information including width, height, aspect ratio and pixel ratio of the canvas.
:::
:::field{name="invalidate" type="() => void"}
Function to mark the scene as needing an update in the next frame. Particularly useful in on-demand rendering mode.
:::
:::field{name="advance" type="() => void"}
Function to manually advance the render loop by one frame. Especially useful in manual rendering mode.
:::
:::field{name="controls" type="Ref"}
Reference to the current camera controls (if any). Useful for camera-based animations.
:::
:::field{name="events" type="EventManager"}
The event manager instance for handling pointer interactions with 3D objects.
:::
::
### The `render` Method Parameters
The `render` method takes a function that receives a single `notifySuccess` callback parameter:
::field-group
:::field{name="notifySuccess" type="() => void"}
A callback function that must be called to indicate the frame has been successfully rendered. This is essential for the render loop to function correctly across all render modes.
:::
::
::note
**Important**: The `render` method does NOT receive a context object like `onBeforeRender` and `onRender`. Instead, use `useTres()` to access the renderer, scene, and camera within your render function.
::
## Type
```ts [Signature]
function useLoop(): UseLoopReturn
interface UseLoopReturn {
/** Stops the render loop */
stop: () => void
/** Starts the render loop */
start: () => void
/** Reactive reference indicating if the loop is currently active */
isActive: Ref
/** Register a callback to run before each render */
onBeforeRender: (fn: LoopCallback, priority?: number) => { off: () => void }
/** Register a callback to run after each render */
onRender: (fn: LoopCallback, priority?: number) => { off: () => void }
/** Take complete control over the rendering process */
render: (fn: RenderFunction) => void
}
type LoopCallback = (context: LoopContext) => void | Promise
type RenderFunction = (notifySuccess: () => void) => void
interface LoopContext {
/** Time in seconds since the last frame */
delta: number
/** Total elapsed time in seconds since render loop started */
elapsed: number
/** The Three.js WebGL renderer instance */
renderer: TresRenderer
/** The currently active camera */
camera: ComputedRef
/** The Three.js scene object */
scene: ShallowRef
/** Reactive size information for the canvas */
sizes: SizesType
/** Reference to current camera controls */
controls: Ref
/** TresJS extension function */
extend: (objects: any) => void
/** Event manager for pointer interactions */
events: EventManager
/** Mark scene for re-render in on-demand mode */
invalidate: () => void
/** Manually advance one frame in manual mode */
advance: () => void
}
interface SizesType {
/** Canvas width in pixels */
width: Ref
/** Canvas height in pixels */
height: Ref
/** Canvas aspect ratio (width / height) */
aspectRatio: Ref
/** Device pixel ratio */
pixelRatio: Ref
}
type TresRenderer = WebGLRenderer | Renderer
```
# useGraph
The `useGraph` composable provides a convenient way to extract and reactively access all named nodes, materials, and meshes from a Three.js object or scene. This is especially useful when working with loaded models or complex object hierarchies, allowing you to reference and manipulate specific parts of your 3D scene by name.
## Usage
```ts
import { useGraph } from '@tresjs/core'
import { BoxGeometry, Group, Mesh, MeshStandardMaterial } from 'three'
// Create a group and add a mesh with a named material
const group = new Group()
const box = new Mesh(
new BoxGeometry(1, 1, 1),
new MeshStandardMaterial({ name: 'FancyMaterial', color: 'red' })
)
box.name = 'Box'
group.add(box)
// Use useGraph to extract nodes and materials
const { nodes, materials } = useGraph(group)
// Change the position of the box by name
nodes.Box.position.set(1, 0, 0)
// Change the color of the material by name
materials.FancyMaterial.color.set('blue')
```
::tip
`useGraph` is especially useful for working with loaded GLTF/FBX models, where you want to access specific meshes or materials by their names as defined in the 3D modeling tool.
::
### Example
When loading a GLTF model, you can use `useGraph` to easily access and manipulate specific parts of the model:
```vue [Model.vue]
```
::note
**Best Practice:** Always assign unique names to important nodes and materials in your 3D models for easier access in code.
::
## API
The `useGraph` composable returns a computed ref containing a `TresObjectMap` with the following structure:
::field-group
:::field{name="nodes" type="Record"}
All named nodes in the object hierarchy, indexed by their `name` property.
:::
:::field{name="materials" type="Record"}
All unique materials, indexed by their `name` property. Only the first material with a given name is included.
:::
:::field{name="meshes" type="Record"}
All unique meshes, indexed by their `name` property. Only the first mesh with a given name is included.
:::
:::field{name="scene" type="Scene | undefined"}
The root scene object, if available.
:::
::
### Type Signature
```ts [Signature]
function useGraph(object: MaybeRef): ComputedRef
interface TresObjectMap {
nodes: { [name: string]: TresObject }
materials: { [name: string]: TresMaterial }
meshes: { [name: string]: Mesh }
scene?: Scene
}
```
## Edge Cases & Notes
- Only the first material or mesh with a given name is included in the map. Duplicate names are ignored after the first occurrence.
- Unnamed objects are not included in the `nodes` map.
- If the input object is `null` or `undefined`, all maps will be empty.
# useLoader
The `useLoader` composable provides a reactive and easy-to-use method for loading 3D models and textures with any Three.js loader. It supports progress tracking, error handling, and works seamlessly with Vue's reactivity system. This makes it ideal for loading assets in TresJS scenes, including GLTF, FBX, textures, and more.
## Usage
### Loading a Texture and Applying to a Mesh
:examples-use-loader-texture
```vue [TextureExample.vue]
```
### Loading a GLTF Model and Rendering a Named Node
:examples-use-loader-gltf
```vue [GLTFExample.vue]
```
### Loading an FBX Model and Rendering It
```vue [FBXExample.vue]
```
## API
The `useLoader` composable returns a reactive object with the following properties:
::field-group
:::field{name="state" type="Ref"}
The loaded asset (model, texture, etc.), or `null` if not loaded yet.
:::
:::field{name="isLoading" type="Ref"}
Indicates if the asset is currently loading.
:::
:::field{name="error" type="Ref"}
Any error encountered during loading.
:::
:::field
---
name: progress
type: "{ loaded: number; total: number; percentage: number }"
---
Progress information for the current load operation.
:::
:::field{name="load" type="(path: string) => void"}
Method to load a new asset from a different path.
:::
::
### Type Signature
```ts [Signature]
function useLoader(
Loader: LoaderProto,
path: MaybeRef,
options?: TresLoaderOptions,
): UseLoaderReturn
```
## Tips & Best Practices
- **Always use the correct loader for your asset type** (e.g., `GLTFLoader` for `.glb/.gltf`, `FBXLoader` for `.fbx`, `TextureLoader` for images).
- **Track loading progress** using the `progress` object to show user feedback.
- **Use a `LoadingManager`** for global progress tracking across multiple assets.
- **Handle errors** by watching the `error` ref and providing fallback UI.
- **Reactive paths:** You can pass a `ref` as the path to automatically reload when the path changes.
::note
If you need to load multiple assets at once, create multiple `useLoader` instances or use a `LoadingManager` to coordinate progress.
::
# Pointer Events
TresJS provides a comprehensive pointer events system that allows you to interact with 3D objects using mouse, touch, and other pointer devices. The event system is built on top of the powerful [`@pmndrs/pointer-events`](https://www.npmjs.com/package/@pmndrs/pointer-events){rel=""nofollow""} package, providing framework-agnostic pointer event handling for Three.js objects.
## Basic Usage
Pointer events are automatically enabled in `TresCanvas` and work seamlessly with all 3D objects. Simply add event listeners directly to your TresJS components:
:examples-pointer-events
```vue
```
## Available Events
TresJS supports all standard pointer events that you can listen to on any 3D object:
### Mouse Events
- `@click` - Fired when the object is clicked
- `@doubleclick` - Fired when the object is double-clicked
- `@contextmenu` - Fired when right-clicking the object
- `@pointerdown` - Fired when pointer is pressed down on the object
- `@pointerup` - Fired when pointer is released over the object
### Hover Events
- `@pointerenter` - Fired when pointer enters the object's bounds
- `@pointerleave` - Fired when pointer leaves the object's bounds
- `@pointerover` - Fired when pointer is over the object
- `@pointerout` - Fired when pointer moves away from the object
- `@pointermove` - Fired when pointer moves while over the object
### Drag Events
- `@pointercancel` - Fired when pointer interaction is cancelled
## Event Objects
Event handlers receive a `PointerEvent` object with useful information:
```vue
```
## Pointer Missed Events
You can listen for events when the pointer misses all objects (clicks on empty space) by adding the `@pointermissed` event directly to the `TresCanvas` component:
```vue
```
## Event Propagation
Events bubble up through the 3D object hierarchy. You can stop propagation using the standard event methods:
:examples-pointer-events-propagation
```vue
```
## Performance Considerations
- Events are automatically optimized using raycasting
- Only objects with event listeners are tested for intersections
- Use `pointer-events: none` in CSS to disable interaction on specific objects
- Consider using object pooling for scenes with many interactive objects
## TypeScript Support
TresJS provides full TypeScript support for pointer events:
```ts
import type { PointerEvent } from '@pmndrs/pointer-events'
function handlePointerEvent(event: PointerEvent) {
// Full type safety for event properties
console.log(event.point) // Vector3
console.log(event.object) // Object3D
console.log(event.xy) // [number, number]
}
```
# Type Guards
To help you work with Three.js objects more effectively, TresJS provides a set of type guard methods. These methods allow you to determine the type of a Three.js object, making your code more robust and easier to maintain.
The supported type guards are:
- `isBufferGeometry`
- `isCamera`
- `isColor`
- `isColorRepresentation`
- `isFog`
- `isGroup`
- `isLayers`
- `isLight`
- `isMaterial`
- `isMesh`
- `isObject3D`
- `isOrthographicCamera`
- `isPerspectiveCamera`
- `isScene`
# v-log
With the v-log directive provided by **TresJS**, you can do this by just adding `v-log` to the instance.
```vue {2,11}
```
## Arguments
Note that you can pass a modifier with the name of **any property**, for example:
```html
```
::prose-warning
The component `` will not log the canvas or the scene.
::
# Scaling Performance 🚀
Running WebGL in the browser can be resource-intensive depending on the user's device capabilities. To make 3D accessible to everyone, it's important to optimize your applications for performance, especially on low-end devices. This guide shares practical tips to help you get the best performance from your TresJS projects.
## Rendering Modes
:examples-on-demand
By default, TresJS renders your scene on every frame. While this works for most cases, if you're building a game or a complex app, you may want to control when rendering happens.
Otherwise it might drain your device battery 🔋 and make your computer sound like an airplane 🛫.
To optimize performance, **scene rendering should be triggered only when necessary events** occur—like user input, camera transformations, or object animations.
You can achieve this by setting the `renderMode` prop to `on-demand` or `manual`:
### Mode `on-demand`
```vue [on-demand.vue]
```
#### Automatic Invalidation
When using `render-mode="on-demand"`, TresJS will automatically invalidate the current frame by observing component props and lifecycle hooks like `onMounted` and `onUnmounted`. It will also invalidate the frame when resizing the window or changing any prop from the `` component like `clearColor` or `antialias`.
### Mode `manual`
If you want to have full control of when the scene is rendered, you can set the `render-mode` prop to `manual`:
```vue [manual-mode.vue]
```
In this mode, Tres will not render the scene automatically. You will need to call the `advance()` method from the useTres composable to render the scene:
```vue [manual-invalidate.vue]
```
#### Manual Invalidation
It’s often not possible to observe every change in your application. In such cases, you can manually invalidate the frame using the `invalidate()` method from the useTres composable.:
```vue [manual-invalidate.vue]
```
### Mode `always`
In this rendering mode, Tres will continuously render the scene on every frame. This is the default mode and the easiest to use, but it's also the most resource expensive one.
```vue [always-mode.vue]
```
::note
**Tip:** Use `on-demand` or `manual` rendering modes for static or mostly-static scenes to save resources and improve battery life.
::
## Limit FPS with `fpsLimit`
If your scene does not need to update at full refresh rate, cap the loop with the `fps-limit` prop on `TresCanvas`. Lowering FPS reduces CPU/GPU work and can improve thermals and battery life.
```vue [fps-limit.vue]
```
## Reactivity and Performance
Vue's reactivity system is powerful, but when working with Three.js objects in a real-time 3D scene, it can introduce unnecessary overhead. Since TresJS scenes often update at high frame rates (e.g., 60 FPS), making Three.js objects deeply reactive can significantly hurt performance.
::warning
Avoid making Three.js objects or their properties deeply reactive. Vue will try to track every change, which is inefficient for objects updated every frame.
::
Instead, use `shallowRef` for Three.js objects. This keeps the reference reactive, but does not make the internal properties reactive, which is much more efficient.
### ❌ Incorrect: Deep Reactivity
```vue [incorrect-reactivity.vue]
```
### ✅ Correct: Use shallowRef and Direct Assignment
```vue [correct-reactivity.vue]
```
::note
**Tip:** Only the `.value` of a `shallowRef` is reactive. The internal properties are not, which is ideal for Three.js objects that are updated frequently.
::
## Dispose Resources with `dispose()`
When a resource is no longer needed—such as a texture, geometry, or material—be sure to dispose of it to free up memory. This is especially important if your app frequently creates and destroys resources, like in games or interactive experiences.
TresJS will automatically dispose of resources recursively when the component is unmounted, but you can also perform this manually by calling the `dispose()` directly from the package:
::warning
To avoid errors and unwanted side effects, resources created programmatically with the use of `primitives` need to be manually disposed.
::
```vue [manual-dispose.vue]
```
::note
**Best Practice:** Always clean up resources when they are no longer needed to prevent memory leaks and keep your application performant.
::
# Primitives
## What are Primitives?
The `` component is a versatile low-level component in TresJS that allows you to directly use any Three.js object within your Vue application without an abstraction. It acts as a bridge between Vue's reactivity system and THREE's scene graph.
This component is particularly useful when you need:
- **Direct Three.js Integration**: Use existing Three.js objects without wrapper components
- **Complex Model Rendering**: Display models loaded from external sources like GLTF files
- **Performance Optimization**: Bypass component overhead for specific use cases
- **Third-party Library Integration**: Integrate objects from Three.js ecosystem libraries
## Basic Usage
The simplest way to use the `` component is by passing a Three.js object to the `object` prop:
```vue [basic-primitive.vue]
```
## Props
The `` component accepts the following props:
### `object`
- **Type**: `Object3D | Ref`
- **Required**: `true`
The primary Three.js object which the primitive component will render. This should be either a plain Three.js object or a reactive reference (preferably `shallowRef`).
```vue
```
### `dispose`
- **Type**: `boolean | 'default' | ((self: TresInstance) => void) | null`
- **Default**: `'default'` (no disposal for primitives)
Controls how the primitive's resources are disposed when removed from the scene:
- `'default'` - Default behavior: don't dispose primitive resources
- `false` or `null` - Explicitly disable disposal
- `true` - Force disposal of the primitive and its resources
- `function` - Custom disposal function
```vue
```
### `attach`
- **Type**: `string | ((parent: any, self: TresInstance) => () => void)`
- **Optional**
Specifies how to attach the primitive to its parent. Can be a property name or a custom attachment function.
::code-group
```vue [Material Attachment]
```
```vue [Geometry Attachment]
```
```vue [Custom Attachment Function]
```
::
### `visible`
- **Type**: `boolean`
- **Default**: `true`
Controls the visibility of the primitive object.
```vue
```
### Pass-through Props
Any other props are passed through to the underlying Three.js object, allowing you to modify its properties directly:
```vue
```
## Events
The `` component supports all the pointer events available on TresJS components, allowing you to interact with the object in the scene:
```vue [primitive-events.vue]
```
:read-more{to="https://docs.tresjs.org/api/events/pointer-events"}
## Children via Slots
You can add children to the `` component using slots. This is particularly useful when you want to add additional objects or materials which are not part of the main object:
```vue [primitive-children.vue]
```
## Usage with Models
The `` component is especially powerful when working with complex models loaded from external sources. Here's how to use it with GLTF models:
::code-group
```vue [TheModel.vue]
```
```vue [app.vue]
```
::
### Working with Multiple Model Parts
If you are working with complex models, you may want to access and manipulate specific parts:
```vue [primitive-model-parts.vue]
```
## Performance Considerations
When using primitives, keep these performance tips in mind:
::note
**Reactivity Optimization**: Use [`shallowRef`](https://vuejs.org/api/reactivity-advanced.html#shallowref){rel=""nofollow""} instead of [`ref`](https://vuejs.org/api/reactivity-core.html#ref){rel=""nofollow""} for Three.js objects to avoid deep reactivity overhead, as Three.js objects have complex internal structures that don't benefit from Vue's reactivity system.
::
```vue
```
::warning
**Manual Disposal Required**: TresJS does NOT automatically dispose primitive resources by default. This is intentional to avoid altering the user's `:object`. You must manually dispose of geometries, materials, and textures when they're no longer needed to prevent memory leaks.
::
```vue
```
### Controlling Disposal Behavior
You can override the default behavior using the `dispose` prop:
```vue
```
## Common Use Cases
### 1. Integrating Third-party Libraries
```vue
```
### 2. Custom Geometries
```vue
```
### 3. Particle Systems
```vue
```
## Customizing the Primitive Component Name
By default, TresJS provides the `` component for rendering Three.js objects. You can customize the component name using the `primitivePrefix` option in ``:
```vue [custom-primitive-prefix.vue]
```
This feature is useful when:
- You need to avoid naming conflicts with other libraries or components
- Your project requires a specific naming convention
- You want to add TypeScript support for custom primitive names
::note
**TypeScript Support**: When using a custom prefix, you can extend Vue's global components type to get full intellisense support:
```typescript
// types/tres.d.ts
import type { TresPrimitive } from '@tresjs/core'
import type { DefineComponent } from 'vue'
declare module 'vue' {
interface GlobalComponents {
myprimitive: DefineComponent
}
}
export {}
```
::
The `` component provides the flexibility to integrate any Three.js object seamlessly into your TresJS application while maintaining the benefits of Vue's reactivity and component system.
# WebGPU
::warning
**Experimental Feature**: WebGPU support in TresJS is experimental and requires modern browser support. WebGPU is still being developed and may have breaking changes.
::
## What is WebGPU?
[WebGPU](https://developer.mozilla.org/en-US/docs/Web/API/WebGPU_API){rel=""nofollow""} is the next-generation graphics API for the web, designed to provide high-performance 3D graphics and general-purpose computing capabilities directly in web browsers. It offers several advantages over WebGL:
### **Key Benefits**
- **Better Performance**: More efficient GPU utilization and reduced CPU overhead
- **Modern GPU Features**: Access to compute shaders, advanced texturing, and modern GPU capabilities
- **Unified API**: Single API for both graphics and compute operations
- **Better Debugging**: Improved error handling and debugging capabilities
- **Future-Proof**: Designed for modern GPU architectures
### **Browser Support**
WebGPU is currently supported in:
- **Chrome/Edge**: Stable support (Chrome 113+)
- **Firefox**: Behind experimental flag
- **Safari**: Experimental support in Safari Technology Preview
::note
Check current WebGPU browser support at [Can I Use WebGPU](https://caniuse.com/webgpu){rel=""nofollow""} and the official [WebGPU support matrix](https://github.com/gpuweb/gpuweb/wiki/Implementation-Status){rel=""nofollow""}.
::
## Usage with TresJS
Import `TresCanvas` from `@tresjs/core/webgpu`. It creates a Three.js `WebGPURenderer` for you, and node materials work as template tags.
::note
`@tresjs/core/webgpu` is available since `@tresjs/core` v5.10. On older versions, see [Without the WebGPU entry](https://docs.tresjs.org/#without-the-webgpu-entry).
::
```vue [basic-webgpu.vue]
```
The root import `@tresjs/core` does not change: its `TresCanvas` still uses `WebGLRenderer`.
### What the WebGPU entry gives you
| | `@tresjs/core` | `@tresjs/core/webgpu` |
| -------------------------------------------------------------------------------------------------------- | -------------------------- | --------------------- |
| Default renderer of `TresCanvas`, `TresCanvasContext`, `useTresContextProvider` and `useRendererManager` | `WebGLRenderer` | `WebGPURenderer` |
| Node materials as tags (``) | No, needs `extend()` | Yes |
| WebGL-only classes as tags (``) | Yes | No |
| `useTres().renderer` type | `WebGLRenderer | Renderer` | `WebGPURenderer` |
All other exports (`useLoop`, `useTresContext`, `extend`, type guards, ...) are the same in both entries.
An app that imports only from `@tresjs/core/webgpu` does not bundle `WebGLRenderer`.
### Node materials as tags
Importing `@tresjs/core/webgpu` adds every class of `three/webgpu` to the [catalogue](https://docs.tresjs.org/api/components/tres-objects), so node materials are Tres components. Their node props take TSL nodes:
```vue
```
The tags are typed. Import anything from `@tresjs/core/webgpu` once in your app, and the editor knows `` and its props.
### Typed `useTres`
Import `useTres` from `@tresjs/core/webgpu` in components inside the canvas. The `renderer` is typed as `WebGPURenderer`, so you do not need a cast:
```ts
import { useTres } from '@tresjs/core/webgpu'
const { renderer } = useTres()
console.log(renderer.backend) // WebGPURenderer-only API, no cast
```
### Standard materials and GLSL
- Standard materials still work. `WebGPURenderer` converts ``, ``, `` and the other built-in materials to their node versions.
- `ShaderMaterial`, `RawShaderMaterial` and `onBeforeCompile` (GLSL) do not work with `WebGPURenderer`. Write the shader with [TSL](https://github.com/mrdoob/three.js/wiki/Three.js-Shading-Language){rel=""nofollow""} and a node material instead.
### Mixed imports are safe
`three` and `three/webgpu` share their core classes. `Mesh` from `three` and `Mesh` from `three/webgpu` are the same class, so you can mix both import paths in one app.
### WebGL2 fallback
When the browser does not support WebGPU, `WebGPURenderer` uses its WebGL2 backend. Node materials and TSL still work on that backend. To check which backend runs:
```ts
const { renderer } = useTres()
const isWebGPU = 'isWebGPUBackend' in renderer.backend
```
If the renderer cannot start at all, `TresCanvas` emits `error` with a `TresRendererError`:
```vue
```
### Custom renderer options
You do not need the `renderer` prop for the normal case. The WebGPU `TresCanvas` passes `antialias`, `alpha`, `depth`, `stencil`, `powerPreference` and `logarithmicDepthBuffer` to `WebGPURenderer`.
For other `WebGPURenderer` options (for example `samples`, `trackTimestamp` or `forceWebGL`), give your own factory:
```vue
```
### Cientos
Import cientos from `@tresjs/cientos/webgpu` (since cientos v5.10, needs `three` r171 or newer). It has the same names and props as `@tresjs/cientos`, but it exports only the components that work under `WebGPURenderer`. Components built on GLSL shaders, such as `ContactShadows`, `MeshReflectionMaterial` and `MeshTransmissionMaterial`, are not exported yet, so importing one fails at build time and names it. See the [cientos WebGPU guide](https://cientos.tresjs.org/getting-started/webgpu){rel=""nofollow""} for the full list.
### Nuxt
Set `renderer: 'webgpu'` in the `tres` options. The module then auto-imports from the `/webgpu` entries:
```ts [nuxt.config.ts]
export default defineNuxtConfig({
modules: ['@tresjs/nuxt'],
tres: {
renderer: 'webgpu',
},
})
```
- `` uses `WebGPURenderer`, and the auto-imported `useTres()` has the `WebGPURenderer` type.
- Cientos components come from `@tresjs/cientos/webgpu`. A component that has no WebGPU version yet (for example ``) still resolves, but it throws an error that names it when it mounts.
- `@tresjs/post-processing` is not auto-imported, because its effects work only with `WebGLRenderer`. The module shows a warning.
- Packages that do not use the renderer, such as `@tresjs/leches`, are auto-imported as usual.
The option applies to the whole app. To use WebGL on one page and WebGPU on another, keep the default `renderer: 'webgl'` and import `TresCanvas` from `@tresjs/core/webgpu` explicitly on the WebGPU pages. An explicit import is not client-only, so put it inside ``.
### Without the WebGPU entry
On versions before v5.10, or to keep the root `TresCanvas`, pass a renderer factory and add the node classes to the catalogue yourself:
```vue
```
Here `useTres().renderer` is typed as `WebGLRenderer | Renderer`, so check it with the `isWebGPURenderer` [type guard](https://docs.tresjs.org/api/utils/type-guards) before you use WebGPU-only APIs.
### Advanced WebGPU Example
:examples-web-gpu
::code-preview
---
class: "[&>div]:*:my-0 [&>div]:*:w-full"
---
:::code-tree{default-value="app.vue"}
```vue [components/HologramCube.vue]
```
```vue [app.vue]
```
:::
::
# TresJS CLI
`@tresjs/cli` is the command line companion for TresJS projects. It exposes a single `tres`
binary that automates the parts of a 3D project that are tedious to write by hand, starting
with turning a `.glb`/`.gltf` model into a real Vue component.
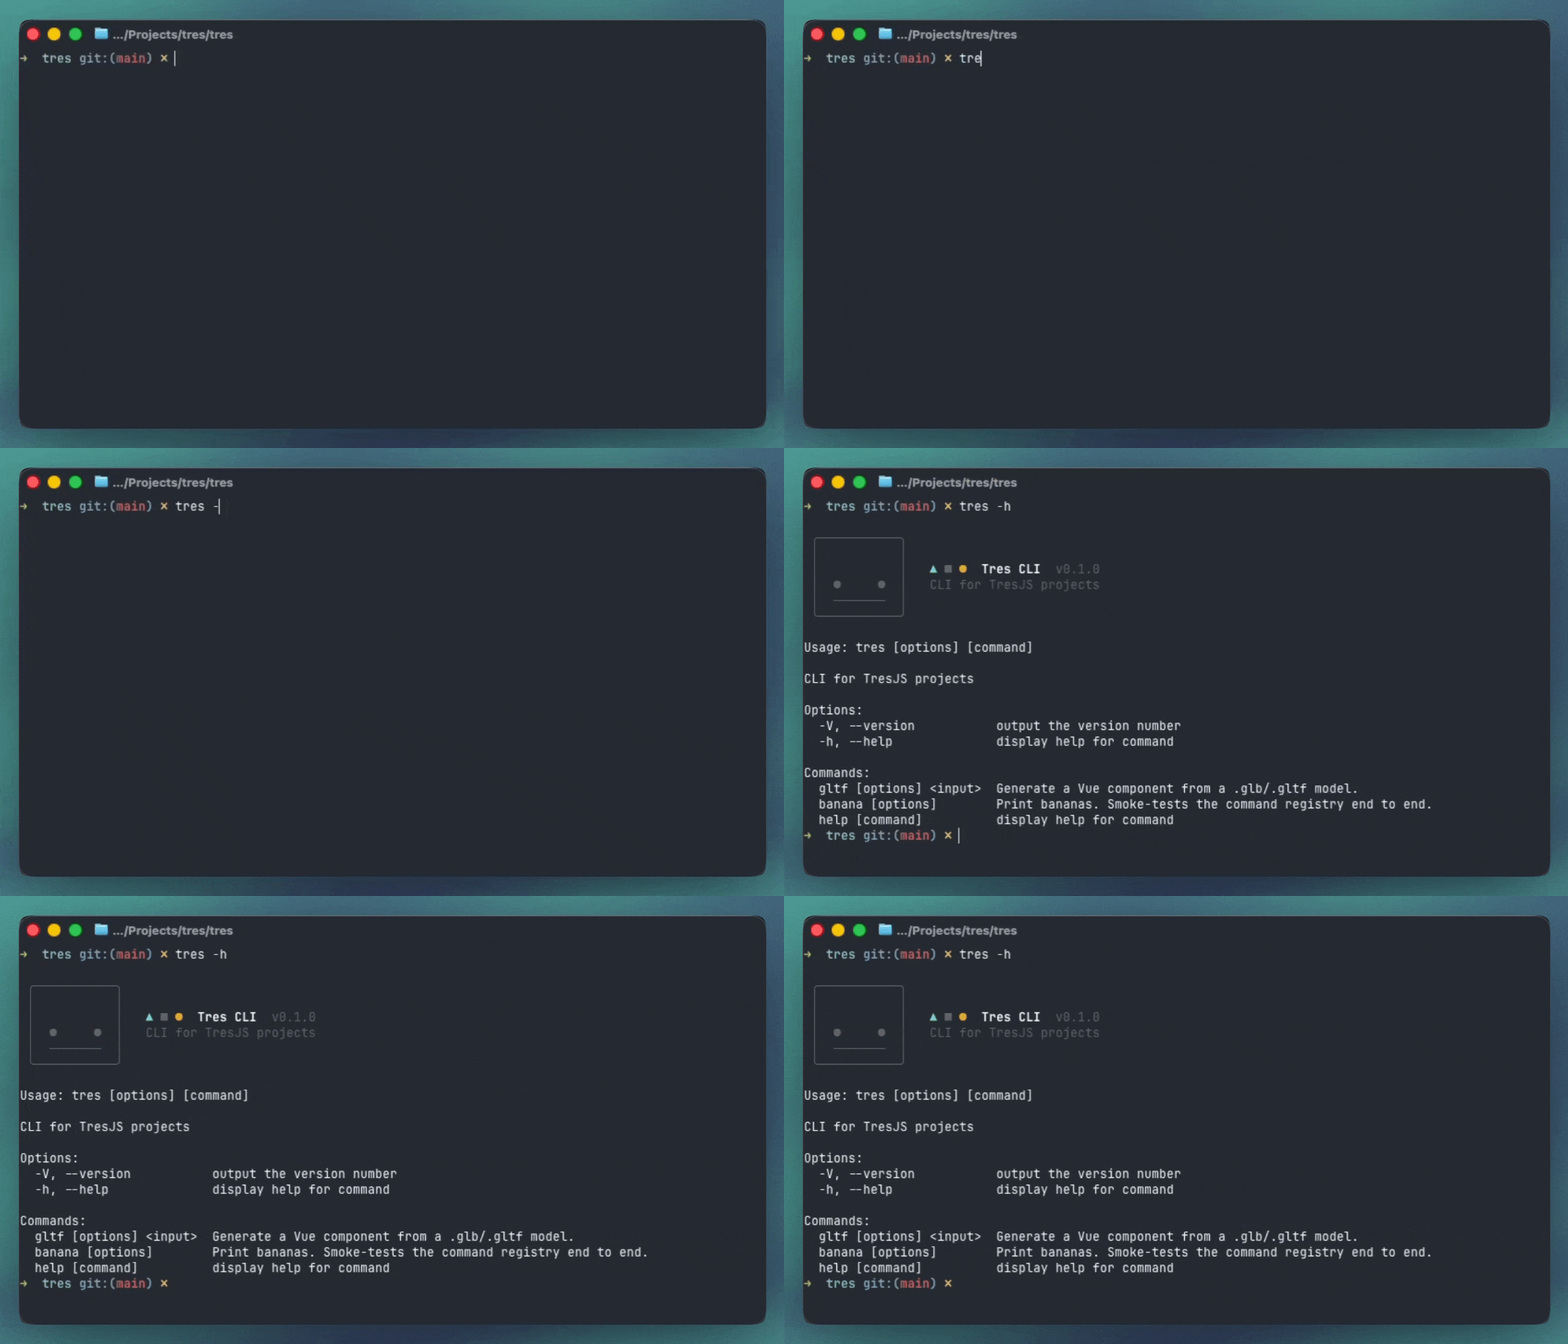{height="366" width="640"}
## Installation
Run it without installing anything:
::code-group
```bash [npm]
npx @tresjs/cli --help
```
```bash [yarn]
yarn dlx @tresjs/cli --help
```
```bash [pnpm]
pnpm dlx @tresjs/cli --help
```
::
Or add it to the project so everyone on the team runs the same version:
::code-group
```bash [npm]
npm install -D @tresjs/cli
```
```bash [yarn]
yarn add -D @tresjs/cli
```
```bash [pnpm]
pnpm add -D @tresjs/cli
```
::
Or install it globally, so `tres` is on your PATH in every project:
::code-group
```bash [npm]
npm install -g @tresjs/cli
```
```bash [yarn]
yarn global add @tresjs/cli
```
```bash [pnpm]
pnpm add -g @tresjs/cli
```
::
::prose-note
`pnpm add -g` needs `pnpm setup` to have run once, which creates the global bin directory and adds
it to your shell profile. Yarn 2+ has no global install, so use `yarn dlx` there.
::
Once installed, the binary is available as `tres`:
```bash
tres --help
```
::prose-note
The CLI requires **Node.js 20 or later**.
::
## Start here
If this is your first time with the CLI, read the story first. It follows one artist and one Vue
developer shipping a robot, and shows what a generated component fixes that `useGLTF` alone does
not.
::card-group
:::card
---
icon: i-lucide-route
title: From model to component
to: https://docs.tresjs.org/cli/from-model-to-component
---
One team, one `.glb`, and the re-export that broke production until the model became a
component.
:::
::
## Commands
::card-group
:::card
---
spotlight: true
icon: i-lucide-box
title: tres gltf
to: https://docs.tresjs.org/cli/gltf
---
Generate a typed Vue component from a `.glb`/`.gltf` model, with a slot per node so your
overrides survive the next export.
:::
::
```bash
tres gltf public/models/robot.glb
# ▲ ■ ● Tres gltf robot.glb
#
# ✔ Parse 12 named nodes · 3 meshes · 2 materials 34ms
# ✔ Emit 3 slots 1ms
#
# ✔ src/models/Robot.gen.vue
# slots Head, Body, Base
#
# Done in 41ms
```
## Global options
| Option | Description |
| :-------------- | :--------------------------------------------------------------------- |
| `-V, --version` | Print the CLI version. |
| `-h, --help` | Print help for the CLI or for a specific command (`tres gltf --help`). |
::prose-note
Looking for a way to **scaffold a new project**? That is a different tool: `npm create tres@latest`.
See the [installation guide](https://docs.tresjs.org/getting-started/installation).
::
## Piping
Progress (the header, the phases, warnings, the file list) goes to **stderr**. **stdout** carries
only what a command produces: the JSON of `--json`, the component of `--console`. So redirecting
gives you the payload alone, while you still watch the run on screen:
```bash
tres gltf public/models/robot.glb --json > robot.json
tres gltf public/models/robot.glb --console | pbcopy
```
Colour follows [`NO_COLOR`](https://no-color.org/){rel=""nofollow""}, and the spinner turns itself off when stderr
is not a terminal, so CI logs get one line per phase instead of a repaint per frame.
# From model to component
`tres gltf` exists because a loaded model is a black box, and a Vue component is not. This page
follows one small team through the difference. If you want the reference instead, go to
[`tres gltf`](https://docs.tresjs.org/cli/gltf).
## The team
Two people ship a product configurator. An artist owns `robot.glb` in Blender and re-exports it
several times a week. A Vue developer owns the app and has never opened Blender. Both want the
same thing: change the model without breaking the app, and change the app without touching the
model.
## Day one: the black box
The developer loads the model the usual way and drops the scene into the canvas:
```vue [App.vue]
```
It renders. Then the first ticket arrives: *the head should glow when hovered*. The developer now
needs one mesh out of the scene graph, and the only handle is a string:
```ts
const head = nodes.Head // Object3D, maybe. Is it a Mesh? Does it exist?
;(head as Mesh).material = hologram
```
Three things are true about this line, and none of them are visible in the editor:
- `nodes.Head` is typed as a generic `Object3D`. The cast to `Mesh` is a guess.
- The name `Head` came from a Blender outliner the developer cannot see.
- Nothing checks the string. If it is wrong, `head` is `undefined` at runtime and the page throws.
The developer gets it working by logging `nodes` to the console and copying names out of it. The
app ships.
## Day two: the re-export
The artist splits the head into `Helmet` and `Face` and re-exports. No code changed, so no test
fails and no type error appears. The build is green. In the browser, the head no longer glows, and
in production it throws on `undefined.material`.
This is the failure `tres gltf` is built around. The contract between the model and the app lived
in a string, and a string cannot tell you when it goes stale.
## Running the command
The developer generates a component from the model instead:
```bash
tres gltf public/models/robot.glb
# ▲ ■ ● Tres gltf robot.glb
#
# ✔ Parse 12 named nodes · 3 meshes · 2 materials 34ms
# ✔ Emit 3 slots 1ms
#
# ✔ src/models/Robot.gen.vue
# slots Helmet, Face, Body, Base
#
# Done in 41ms
```
The output is a `.vue` file. That single fact changes what the team can do with the model:
- **Read it.** Every node is a `` or `` with its transform written out. The
developer sees the structure of the model without opening Blender.
- **Diff it.** The next re-export produces a new file, and the pull request shows exactly which
nodes moved, appeared or disappeared. The artist's change is reviewable like any other change.
- **Type-check it.** The component declares the nodes, materials and clips the model actually has.
The rest of the app compiles against that declaration.
## Overriding without owning
The generated file is disposable. The head glow does not go in it. It goes in the parent, as a
slot override, and the generated markup stays as the fallback:
```vue [App.vue]
```
`node` here is a `Mesh`, not an `Object3D`, because the generator saw a mesh at that node and said
so. The cast is gone. The console logging is gone. And the next re-export overwrites
`Robot.gen.vue` without touching `App.vue`, so the override survives every export the artist makes.
## The rename becomes a type error
On day two the artist renamed a node and the app broke in production. With the component, the same
rename fails in the editor:
```text
App.vue:9:15 - error TS2339: Property 'Head' does not exist on type
'{ Helmet: (props: { node: Mesh }) => any; Face: …; Body: …; Base: … }'.
```
The developer reads the new slot names off the error, updates the override, and the failure never
reaches a browser. The contract now lives in a type, and types go stale loudly.
## Animations with names
The artist adds an idle loop. The generated component picks up the clip and hands the bound
actions to `@ready`, keyed by a union of the clip names:
```vue [App.vue]
```
`actions.Idle` autocompletes. `actions.Idel` is a compile error. When the artist ships the clips in
separate files, as Mixamo and most asset packs do, `--animations` merges them and the CLI checks
each clip's tracks against the model's node names, which is the one animation failure that is
otherwise silent at runtime.
## Physics without a spreadsheet
The configurator grows a showroom floor the robot can fall onto. Instead of the developer measuring
boxes and typing collider sizes, the artist names the meshes in Blender: `Floor-col`,
`Crate-rigid`, `Trigger-sensor`. The command reads the names:
```bash
tres gltf public/models/showroom.glb --physics rapier
```
Each suffixed mesh becomes a `RigidBody` sized from its own geometry when the model loads. The
artist reshapes the floor, the collider follows, and no number in the codebase has to be updated.
## Shipping smaller, shipping many
Two flags close the loop for production:
- `--transform` runs the model through glTF-Transform and points the component at a
`robot-transformed.glb` that is typically 70 to 90 percent smaller. The original stays untouched.
- `--instance` batches repeated meshes into an `InstancedMesh`, so the showroom can render twenty
robots for the draw calls of one.
Both are decisions the developer makes once, in the command, and the artist never sees them.
## What changed for the team
| | Before | After |
| :------------------------ | :----------------------------------- | :-------------------------------- |
| Where a node's name lives | In a string the developer typed | In a slot the compiler checks |
| What a renamed node does | Throws in production | Fails to compile |
| Where an override lives | Inside a `traverse()` over the scene | In the parent, as a slot |
| What a re-export costs | Re-test every override by hand | Re-run one command, read the diff |
| Who authors physics | The developer, with numbers | The artist, with names |
| What a reviewer sees | A new binary in the PR | A readable `.vue` diff |
The artist still exports from Blender. The developer still writes Vue. The command sits between
them and turns the handoff into a type.
::read-more{to="https://docs.tresjs.org/cli/gltf"}
Every flag, the generated file in full, and the edge cases are in the `tres gltf` reference.
::
# tres gltf
`tres gltf` turns a model into a Vue component you can read, diff and type-check, instead of a
`` black box.
```bash
tres gltf public/models/robot.glb
# ▲ ■ ● Tres gltf robot.glb
#
# ✔ Parse 12 named nodes · 3 meshes · 2 materials 34ms
# ✔ Emit 3 slots 1ms
#
# ✔ src/models/Robot.gen.vue
# slots Head, Body, Base
#
# Done in 41ms
```
The slot list is capped at the first six names, since a level with sixty of them would bury the
paths above it. `--verbose` prints them all, and the generated file carries the authoritative
list in its `defineSlots<{ … }>`.
Then use it like any other component:
```vue [App.vue]
```
## What gets generated
Every node in the model becomes a real element, and every node the artist named becomes a
`` whose fallback is the generated markup:
```vue [src/models/Mug.gen.vue]
```
A few things are worth pointing out:
::prose-list
- **`ModelNodes` and `ModelMaterials`** describe *this* export, so `nodes.Mug` is a `Group` and not an `any`.
- **Draco is detected**, and `{ draco: true }` is passed automatically. A Draco model renders nothing without it.
- **Lights, cameras and bones** are emitted as ``: their props live on the parsed object, and a bone must *be* the parsed object for skinning to work.
- **The root `TresGroup` stays mounted** and gates its children with `v-if="!isLoading"`, so refs on it are stable.
- **`@ready` fires once per load**, carrying `{ nodes, materials }`, and `isReady` exposes the same state as a value. An event that already fired cannot be read after the fact, which is what `isReady` is for: a parent that binds late, or a state machine that wants to ask later. Refetching the model (`useGLTF` exposes `execute()`) puts `isReady` back to `false` and arms `ready` again.
- **Readiness reads `state`, not just `isLoading`.** `isLoading` is cleared in a `finally`, so a 404 clears it exactly like a success would; `state` is only set when the load produced a scene. Without that term a failed load would call the model ready with empty `nodes` and `materials`.
::
## Overriding a node
The generated file is disposable. Anything you want to change lives in the parent, as a slot
override:
```vue [App.vue]
```
Re-run `tres gltf` after the artist re-exports and the override survives, because it never lived
in the generated file. If the artist *renames* `Head`, the override becomes a type error instead
of silently disappearing at runtime.
::prose-note
`--slots named` (the default) skips exporter noise like `Object_12`, `Sketchfab_model` or
`Armature`, since overriding those means nothing. On marketplace assets where **every** mesh is
exporter-named, the CLI says so and points you at `--slots all`.
::
## Nodes and materials from the parent
The component exposes `nodes` and `materials`, so a parent can reach into the model without
re-loading it:
```vue
```
::prose-note
If you only need them the moment the model is ready, `@ready="({ nodes, materials }) => …"` hands
you the same pair without a ref. The exposed `nodes` and `materials` are for reaching in at any
point after.
::
## Animated models
When the model ships animation clips, the generated component also wires up
[`useAnimations`](https://cientos.tresjs.org/api/miscellaneous/use-animations){rel=""nofollow""} and hands the
bound `actions` to `@ready`, keyed by a union of the clip names:
```ts
type ActionName
= | 'Idle'
| 'Walk'
| 'Death_A'
```
`@ready` fires once per load, after the clips have loaded and the mixer has bound its actions, with
`{ nodes, materials, actions }`. No template ref, and `actions.Idle` is there to play:
```vue [App.vue]
```
Prefer the event over reaching through a ref. The mixer binds its actions a flush after the clips
land (`useAnimations` runs `flush: 'post'` for exactly this), so a handler that reads `actions`
too early sees them undefined. `@ready` waits for the binding; `isReady` exposes the same state
as a value, `false` until it holds and reset on any refetch, for a parent that binds late or asks
again later.
A mixer resolves every track against a node **name**, so the CLI keeps the name of every node a
clip drives, whatever `--slots` or `--keepnames` say. A group that exists only to be animated
survives pruning for the same reason:
```vue
```
Nodes no clip mentions are unaffected, so this costs nothing on a model with no animation on it.
Batched nodes keep their names too: see [instancing](https://docs.tresjs.org/#instancing-repeated-meshes).
### Clips from separate files
Mixamo, KayKit and Quaternius all ship the mesh in one file and the clips in others, so a
mesh-only export has nothing to wire. Generating one says so:
```bash
tres gltf public/models/Dummy.glb
# ⚠ This model is skinned but carries no animation clips. Pass --animations to wire in clips exported to separate files.
```
Point `--animations` at the clip files, once per file. A KayKit character, whose 39 clips ship
as three libraries beside the rig:
```bash
tres gltf public/models/Dummy.glb \
--animations public/models/animations/Rig_Medium_General.glb \
--animations public/models/animations/Rig_Medium_MovementBasic.glb \
--animations public/models/animations/Rig_Medium_MovementAdvanced.glb
# ▲ ■ ● Tres gltf Dummy.glb
#
# ✔ Parse 51 named nodes · 8 meshes · 1 material · 37 clips merged 37ms
# ✔ Emit 6 slots 1ms
#
# ✔ src/models/Dummy.gen.vue
# slots Dummy_ArmLeft, Dummy_ArmRight, Dummy_Body, Dummy_Head,
# Dummy_LegLeft, Dummy_LegRight
# clips Death_A, Death_A_Pose, Death_B, Death_B_Pose, Hit_A, Hit_B,
# … 31 more — rerun with --verbose
#
# Done in 87ms
```
The merged names are the ones `ActionName` will carry, so they are printed back; `--verbose`
lists all of them.
The component loads each one and merges the clips into a single array, the model's own first:
```ts
const { nodes, materials, isLoading } = useGLTF('/models/Dummy.glb')
const { state: rigMediumGeneral, isLoading: rigMediumGeneralLoading } = useGLTF('/models/animations/Rig_Medium_General.glb')
const { state: rigMediumMovementBasic, isLoading: rigMediumMovementBasicLoading } = useGLTF('/models/animations/Rig_Medium_MovementBasic.glb')
const { state: rigMediumMovementAdvanced, isLoading: rigMediumMovementAdvancedLoading } = useGLTF('/models/animations/Rig_Medium_MovementAdvanced.glb')
const animations = computed(() => {
// The mixer resolves every track against a node name in the rendered tree and never
// retries a miss, so the clips must not reach it before the model they drive.
if (isLoading.value) {
return []
}
return [
...(rigMediumGeneral.value?.animations ?? []),
...(rigMediumMovementBasic.value?.animations ?? []),
...(rigMediumMovementAdvanced.value?.animations ?? []),
]
})
```
That guard matters: a clip library is a fraction of the size of the model it drives, so its
files arrive first. Handing a mixer clips before the tree exists binds every track to nothing,
and three caches the miss instead of retrying it.
`ActionName` becomes the union across every file, and the node names the external clips drive
survive pruning exactly like the model's own would. Each file gets its own url, inferred from
`public/` the same way the model's is, and its own `{ draco: true }` when it is compressed.
This is where `@ready` earns its place over a hand-rolled watch. Each clip file resolves on its
own, so `actions` can populate with the first library's clips and repopulate as the others land.
The generated gate names every condition it waits for, and holds until all of them hold:
```ts
const isReady = ref(false)
watch(
() => !isLoading.value
&& !rigMediumGeneralLoading.value
&& !rigMediumMovementBasicLoading.value
&& !rigMediumMovementAdvancedLoading.value
&& state.value !== null
&& Object.keys(actions).length > 0,
(ready) => {
if (!ready) {
isReady.value = false
return
}
// …emit('ready', { nodes: nodes.value, materials: materials.value, actions })
},
{ flush: 'post', immediate: true },
)
```
A watch that fired on the first non-empty `actions` would see only the General clips, and
`actions.Jump_Start` (a MovementBasic clip) would be `undefined`. `@ready` waits for the lot.
The `state` term is doing something less obvious. The actions bind against the root group, which
stays mounted whatever the load did, so clips from a `--animations` file fill `actions` even when
the **model** itself 404s. Without that term a rig that never arrived would still report ready.
#### When two files carry the same clip name
Clip libraries overlap — the three above all ship a `T-Pose`. The array decides: a mixer keys
`actions` walking it, so the **last** file passed wins, and an `--animations` clip always
overrides one the model came with. `ActionName` lists the name once. The CLI says which file
won rather than leaving it to be discovered:
```bash
# ⚠ Both Rig_Medium_General.glb and Rig_Medium_MovementBasic.glb carry "T-Pose". Rig_Medium_MovementBasic.glb is merged last, so its clip is the one that plays.
```
Pass the file you want to win last.
::prose-note
The CLI parses the clip files too, so it can compare each clip's track targets against the
model's node names — the one animation failure that is completely silent at runtime. A clip that
drives nodes this rig does not have gets a warning; a clip where **nothing** binds is left out of
`ActionName` entirely, since it could never play.
::
## Where the file is written
By default the component is written next to the model as `.gen.vue`, with one exception:
if the model lives under `public/`, the component goes to `src/models/` (or `app/models/` on
Nuxt) instead. A bundler copies `public/` verbatim and never compiles it, so a component written
there could never be imported.
```bash
tres gltf public/models/robot.glb # → src/models/Robot.gen.vue
tres gltf src/assets/robot.glb # → src/assets/Robot.gen.vue
tres gltf public/models/robot.glb -o src/components/Robot.vue
```
`models/` rather than `components/` is deliberate: component directories are auto-scanned by
`unplugin-vue-components` and Nuxt, and the dot in `.gen.vue` produces an invalid identifier in
the generated `components.d.ts`.
::prose-warning
The CLI refuses to overwrite a file it did not generate. Pass `--force` to replace a
hand-written file anyway.
::
## The model url
The url baked into `useGLTF` is inferred from the nearest `public/` directory above the model:
`public/models/robot.glb` becomes `/models/robot.glb`. With no `public/` in sight the CLI warns
and guesses, so set it yourself:
```bash
tres gltf assets/robot.glb --url https://cdn.example.com/robot.glb
```
## Optimizing the model
`--transform` runs the model through [glTF-Transform](https://github.com/donmccurdy/glTF-Transform){rel=""nofollow""}
(dedup, weld, texture resize and compression, Draco, and more) before generating. Savings of
70–90% are typical:
```bash
tres gltf public/models/robot.glb --transform
# ▲ ■ ● Tres gltf robot.glb
#
# ✔ Transform 755KB › 40KB -95% 1.2s
# ✔ Parse 12 named nodes · 3 meshes · 2 materials 34ms
# ✔ Emit 3 slots 1ms
#
# ✔ src/models/Robot.gen.vue
# slots Head, Body, Base
# useGLTF() now loads robot-transformed.glb
#
# Done in 1.3s
```
While it runs, the `Transform` line names the step it is on (`compressing textures`,
`encoding draco`, and the rest), so a slow model is never a silent one.
The optimized file is written **beside the source** as `-transformed.glb`; the original is
never touched. The generated `useGLTF()` points at the optimized file, and since the output is
Draco-compressed it gets `{ draco: true }` automatically.
::prose-list
- **`--resolution `** caps texture size (default `1024`), and **`--format `** picks the codec: `webp` (default), `jpeg`, `png` or `avif`.
- **`--simplify`** reduces geometry with meshoptimizer, tuned by `--ratio` (fraction of vertices to keep) and `--error` (error ceiling, as a fraction of mesh radius).
- **`--keepmeshes`** and **`--keepmaterials`** switch off mesh joining and material batching, which is what you want when the node structure has to survive.
::
::prose-warning
Joining and simplification change the node graph, so node names (and therefore slot names) can
move. Decide on `--transform` **before** you write slot overrides against them.
::
## Instancing repeated meshes
`--instance` collapses meshes that share a geometry and a material into a single
`InstancedMesh`. Because one SFC is one component, this restructures the output into **two**
files: a provider that owns the load and the batches, and the model that renders into them.
```bash
tres gltf public/models/robot.glb --instance
# ▲ ■ ● Tres gltf robot.glb
#
# instancing needs deduplicated geometry, so --transform is on and --keepmeshes with it
# ✔ Transform 755KB › 48KB -94% 1.1s
# ✔ Parse 12 named nodes · 3 meshes · 2 materials 31ms
# ✔ Emit 3 slots 1ms
#
# ✔ src/models/Robot.instances.gen.vue ← owns the load and the batches
# ✔ src/models/Robot.gen.vue ← renders against them
```
The payoff is across copies, not inside one. Wrap them in the provider and the model is loaded
and parsed once, with every copy costing the drawcalls of one:
```vue [App.vue]
```
The provider is found through `provide`/`inject`, so the copies can sit anywhere below it. A
`` rendered **outside** its provider throws with a message saying so, rather than
rendering nothing.
Each copy still emits its own `@ready` and exposes `isReady`. The provider owns the load, so the
model reads the injected data instead of an `isLoading` of its own: ready follows the actions
binding when the model is animated, and the nodes populating when it is not.
`--instance` only batches a geometry that two or more meshes share. `--instanceall` batches
every eligible mesh, including the ones that appear once, which pays off when the whole model is
on screen many times. Skinned meshes and meshes with morph targets are never batched: an
`InstancedMesh` has nowhere to put per-mesh skeletons or morph influences.
::prose-warning
**Instancing turns `--transform` on.** Batching dedupes by geometry identity, and an unoptimized
export hands three.js one geometry object per node however identical they are, so instancing
without the pipeline finds nothing to batch. `--keepmeshes` comes with it, since joining would
weld the repeats into a single mesh and leave nothing to batch either.
::
::prose-note
**Batching does not cost a clip its target.** An `` is a real node with a real `name`,
and the batch re-reads every instance's world matrix each frame, so a mixer drives batched
geometry exactly as it drives a mesh. `batch` is what it joins, `name` is what it is called: a
bucket is keyed after its first mesh, so the two differ as soon as more than one mesh shares a
geometry.
::
### Overriding an instanced node
Slots still work, but a batched node has no geometry or material of its own to hand you. It gets
the batch's instead, its placement, and `batch`: the key its `InstancedMesh` registered under.
That key is what an override needs to stay in the batch:
```vue [App.vue]
```
Leaving the batch is **one drawcall traded for control**. That is exactly what the geometry and
material bindings are for, but it is not free.
::prose-warning
**Pass `batch`, never the slot name.** A bucket's batch is keyed after its first mesh, so a slot
named `Screw_3` may belong to the batch `Screw_0`. An `` whose `batch` matches nothing
registers with nothing and renders nothing, so it warns in the console rather than going quiet.
::
::prose-note
Lights and cameras are emitted as ``, and an `Object3D` has one parent,
so a second copy of the model steals them from the first. The CLI warns when an instanced model
contains any and suggests generating from a subtree with `--root`.
::
## Physics from node names
`--physics rapier` reads collision off the node names, so an artist authors the physics in
Blender and nobody edits the generated file. The vocabulary is
[Godot's](https://docs.godotengine.org/en/stable/tutorials/assets_pipeline/importing_3d_scenes/node_type_customization.html){rel=""nofollow""},
so a level already named for its importer works unchanged:
```bash
tres gltf public/models/level.glb --physics rapier
# ▲ ■ ● Tres gltf level.glb
#
# ✔ Parse 48 named nodes · 31 meshes · 4 materials 61ms
# ✔ Emit 12 slots · 19 colliders 2ms
#
# ✔ src/models/Level.gen.vue
#
# Done in 70ms
```
| Suffix | Body | Shape | Mesh |
| :------------- | :--------------------------------------------------- | :---------- | :----- |
| `-col` | fixed | trimesh | drawn |
| `-colonly` | fixed | trimesh | hidden |
| `-convcol` | fixed | convex hull | drawn |
| `-convcolonly` | fixed | convex hull | hidden |
| `-rigid` | dynamic | convex hull | drawn |
| `-rb-` | `fixed`, `dynamic`, `kinematic`, `kinematicVelocity` | per body | drawn |
| `-sensor` | fixed, `sensor` | convex hull | hidden |
`only` in the name is what hides the mesh, so a collision proxy never draws and a collidable prop
still does. Append a shape to override the default: `Crate-rigid-cuboid`, `Ramp-colonly-hull`.
Shapes are `cuboid`, `ball`, `capsule`, `cone`, `cylinder`, `hull` and `trimesh`. Separators can
be `-`, `_` or `$`, matching is case-insensitive, and a Blender duplicate counter is read through:
`Can-rigid.001` is a body like its original.
Each suffixed mesh becomes a `RigidBody` from [`@tresjs/rapier`](https://rapier.tresjs.org/){rel=""nofollow""}:
```vue [src/models/Level.gen.vue]
```
Nothing is sized at generate time. `RigidBody` derives its colliders from the geometry of its own
mesh children when the model loads, so a re-export that reshapes a mesh reshapes its collider, and
the numbers never drift from the ones rapier would have picked. `:position` and `:rotation` sit on
the body, which rapier seeds the simulation from. `:scale` stays on the mesh, where rapier reads it
to size the collider.
The component never renders its own ``, since one world holds many models:
```vue [App.vue]
```
::prose-note
**Suffix meshes, not groups.** A body reads the geometry off its own direct children, so a group
has nothing to give it. Suffix the meshes inside instead, and each becomes its own body. A suffix
on a group is reported and generates nothing.
::
A suffix that nearly parses is reported rather than dropped, because a level with no collision
and no explanation is the worst outcome available:
```bash
# ⚠ Barrel-rb-dynmic: "-rb-dynmic" reads like a collider suffix, but "dynmic" is not a
# body type (fixed, static, dynamic, kinematic, kinematicvelocity). Nothing was generated for it.
```
Without `--physics`, the CLI still counts the suffixes it finds and tells you to pass
`--physics rapier` to act on them, so a level full of collision names nobody wired up is never
silent.
::prose-warning
Two things rapier cannot express, and both are warned about. Bodies do not nest: a proxy inside
another body simulates independently and drifts from it. A body under a transformed ancestor is
placed as if that transform were not there, because rapier simulates in world space. Apply
transforms on export.
::
Combines with `--instance`: a batched body keeps one draw call for the visuals and gets an
invisible proxy mesh so it still has a geometry to collide with. Batched visuals trail physics by
one frame, since the provider packs its matrices before the bodies write their poses.
::read-more{to="https://rapier.tresjs.org/"}
`RigidBody`, collider shapes and the `` world are documented in the rapier docs.
::
## Inspecting a model
`--dry-run` reports what the parser sees and writes nothing:
```bash
tres gltf public/models/artificer.glb --dry-run
# ▲ ■ ● Tres gltf artificer.glb
#
# ✔ Parse 51 named nodes · 8 meshes · 1 material 53ms
# 76 animation clips
# run without --dry-run to generate a component
```
Models with meshes that share a geometry and material also report how many *instancing
candidates* they have, which is what `--instance` would batch. With `--animations`, each clip
file is counted on its own line and the merged total below them — the total is not the sum: a
name in two files counts once, and a clip nothing binds counts not at all.
```bash
tres gltf public/models/Dummy.glb \
-a public/models/animations/Rig_Medium_General.glb \
-a public/models/animations/Rig_Medium_MovementBasic.glb \
-a public/models/animations/Rig_Medium_MovementAdvanced.glb \
--dry-run
# ▲ ■ ● Tres gltf Dummy.glb
#
# ✔ Parse 51 named nodes · 8 meshes · 1 material · 37 clips merged 29ms
# 0 animation clips
# + Rig_Medium_General.glb: 15 clips
# + Rig_Medium_MovementBasic.glb: 11 clips
# + Rig_Medium_MovementAdvanced.glb: 13 clips
# 37 clips merged
# run without --dry-run to generate a component
```
`--json` dumps the full parse, and `--console` prints the component to stdout instead of writing
it, which is handy for piping or for a quick look before committing. With `--instance`, both
halves are printed, separated by the filename the provider would have been written to.
## Options
| Flag | Default | Description |
| :------------------------- | :---------------------- | :---------------------------------------------------------------------------------------------- |
| `-o, --output ` | `.gen.vue` | Where to write the component. |
| `-u, --url ` | inferred from `public/` | The url the model is served from at runtime. |
| `-a, --animations ` | none | A glb/gltf to take animation clips from, merged with the model's own. Repeatable. |
| `-s, --slots ` | `named` | `named`, `all` or `none`. |
| `--shadows` | `false` | Add `cast-shadow` and `receive-shadow` to every mesh. |
| `-K, --keepgroups` | `false` | Keep pass-through groups that carry nothing but nesting. |
| `-k, --keepnames` | `false` | Keep `name` attributes on the emitted elements. |
| `-r, --root ` | scene root | Generate from this subtree only. |
| `-p, --precision ` | `2` | Fractional digits kept on transforms. |
| `-m, --meta` | `false` | Emit glTF `extras` as `:user-data`. |
| `-c, --console` | `false` | Print the component instead of writing it. |
| `-f, --force` | `false` | Overwrite a file this tool did not generate. |
| `-v, --verbose` | `false` | List every slot and clip name instead of the first few. |
| `-T, --transform` | `false` | Optimize the model into a separate `-transformed.glb` and generate against it. |
| `-i, --instance` | `false` | Batch meshes that share a geometry and material into an `InstancedMesh`. Implies `--transform`. |
| `-I, --instanceall` | `false` | Batch every eligible mesh, even the ones that appear once. Implies `--transform`. |
| `-P, --physics ` | none | Generate colliders from node name suffixes. Engines: `rapier`. |
| `--resolution ` | `1024` | Max texture size when transforming. |
| `--format ` | `webp` | Texture format when transforming: `webp`, `jpeg`, `png` or `avif`. |
| `--simplify` | `false` | Reduce geometry with meshoptimizer when transforming. |
| `--ratio ` | `0` | Target fraction of vertices to keep with `--simplify`. `0` keeps as few as the error allows. |
| `--error ` | `0.001` | Error ceiling with `--simplify`, as a fraction of mesh radius. |
| `--keepmeshes` | `false` | Do not merge meshes when transforming. |
| `--keepmaterials` | `false` | Do not batch materials when transforming. |
| `--dry-run` | `false` | Report what the parser sees, generate nothing. |
| `--json` | `false` | Print the full parse as JSON. |
## Supported models
Both `.glb` and unpacked `.gltf` + `.bin` + textures work, as do Draco-compressed models. Pass
the **path to the file**, not the url it is served from:
```bash
tres gltf /models/robot.glb # ✗ that is the url
tres gltf public/models/robot.glb # ✓ that is the file
```
::read-more{to="https://cientos.tresjs.org/getting-started/loading-models"}
Compare this workflow with `useGLTF` and `GLTFModel` in the cientos docs.
::
# OrbitControls
:examples-orbit-controls
OrbitControls is a camera controller that allows you to orbit around a target. It's a great way to explore your scene interactively.
::note
The OrbitControls utility, which allows users to easily navigate around a 3D scene, isn't included in the core Three.js library by default. To use it, you need to import it manually from the `three/addons/controls/OrbitControls` module via the `three-stdlib` package. Alternatively, if you're using the TresJS ecosystem, you can opt for a ready-to-use version of OrbitControls available as a component in the `@tresjs/cientos` package.
::
## Using OrbitControls Manually
To use `OrbitControls` manually, import it and extend the catalog:
```ts [setup.ts]
import { extend } from '@tresjs/core'
import { OrbitControls } from 'three/addons/controls/OrbitControls'
extend({ OrbitControls })
```
Now you can use the `TresOrbitControls` component in your scene. Since [OrbitControls](https://threejs.org/docs/#examples/en/controls/OrbitControls){rel=""nofollow""} needs a reference to the camera and renderer, you can use the `useTres` composable:
::code-group
```vue [OrbitControls.vue]
```
```vue [App.vue]
```
::
:read-more{to="https://docs.tresjs.org/api/components/tres-objects#extending-the-catalogue"}
## OrbitControls from `@tresjs/cientos` (Recommended)
The [`@tresjs/cientos`](https://cientos.tresjs.org/){rel=""nofollow""} package provides a plug-and-play `` component that wraps the ThreeJS OrbitControls. You don't need to extend the catalog or pass any arguments—it just works!
```vue [CientosOrbitControls.vue]
```
::tip
Make sure the `PerspectiveCamera` is set first in the canvas, otherwise controls might not work as expected.
::
# Basic Animations
:examples-basic-animation
This recipe covers the fundamentals of creating smooth animations in TresJS.
::steps
### Import `useLoop` composable
The `useLoop` composable is the core of TresJS updates, which includes: **animations**. It allows you to register a callback that will be called every time the renderer updates the scene with the browser's refresh rate.
```ts
import { useLoop } from '@tresjs/core'
const { onBeforeRender } = useLoop()
onBeforeRender(() => {
// Animation logic here
})
```
:read-more{to="https://docs.tresjs.org/api/composables/use-loop"}
### Get a reference to the object you want to animate
Similar to Vue, you can use [template refs](https://vuejs.org/guide/essentials/template-refs){rel=""nofollow""} to access the Three.js object instance and manipulate its properties. If you want to optimize even further, you can use `shallowRef` to avoid unnecessary reactivity.
```vue [RotatingCube.vue]
```
:::read-more
---
to: https://docs.tresjs.org/api/advanced/performance#reactivity-and-performance
---
To read more about reactivity and performance in TresJS.
:::
## Use `delta`
The `onBeforeRender` callback provides a `delta` parameter, which represents the time elapsed since the last frame. This is useful for creating frame rate independent animations.
```ts
onBeforeRender(({ delta }) => {
if (cubeRef.value) {
cubeRef.value.rotation.x += delta
cubeRef.value.rotation.y += delta
}
})
```
Without using `delta`, the animation speed would vary depending on the frame rate, leading to inconsistent behavior across different devices, like the example below:
:::div{.w-full.flex.border.border-gray-200.rounded-lg.overflow-hidden}
::::div{.w-1/2.border-r.border-gray-200}
:::::div{.text-center.p-2.border-b.border-gray-200.font-bold}
60fps
:::::
:examples-basic-animation-60fps
::::
::::div{.w-1/2}
:::::div{.p-2.text-center.p-2.border-b.border-gray-200.font-bold}
120fps
:::::
:examples-basic-animation-120fps
::::
:::
:::div{.p-2.text-xs.text-gray-500.italic.mt-2.block.text-center}
The value of \`delta\` is 0.016 for 60fps and 0.008 for 120fps, this difference ensures that the cube rotates at the same speed on both frame rates.
:::
## Using `elapsed`
The `onBeforeRender` callback also provides an `elapsed` parameter, which represents the total time elapsed since the start of the animation. This can be useful for creating time-based animations like oscillations.
```ts
onBeforeRender(({ elapsed }) => {
if (cubeRef.value) {
cubeRef.value.position.y += Math.sin(elapsed) * 0.01
}
})
```
:examples-basic-animation-elapsed
::
# Model Animation
:examples-model-animation
Let's bring your 3D models to life with animations in TresJS. This guide covers loading animated models and controlling their playback.
## Where to find models?
You can find quality 3D models for your projects in various online repositories. Here are some hand picked sources from the TresJS community:
- [poly.pizza](https://poly.pizza/){rel=""nofollow""} - A collection of free 3D models.
- [Pmndrs Marketplace](https://market.pmnd.rs/){rel=""nofollow""} - A marketplace for 3D assets. All free
- [KayKit Character Packs](https://kaylousberg.itch.io/){rel=""nofollow""} - Free and paid character packs. Animated, all CC0, a personal favorite of ours.
For this tutorial we will use a simplified version of the **KayKit Knight character**, you can download it directly from :u-button[here]{:to="/models/knight/Knight.glb" download="true" external="" icon="i-lucide-arrow-down" variant="ghost"}.
## Loading Animated Models
::steps
### Install cientos
If you haven't already, install the `@tresjs/cientos` package, which provides components for loading 3D models.
```bash
npm install @tresjs/cientos
```
### Load the Model
Use the `useGLTF` composable from `@tresjs/cientos` to load your animated model. Add the downloaded GLB file to your public directory in a subfolder like `/models/knight/`.
```vue [Knight.vue]
```
:::read-more{to="https://cientos.tresjs.org/api/loaders/use-gltf"}
Learn more about the `useGLTF` composable.
:::
:::tip
Instead of wiring the model up by hand, you can generate a typed component from it with
`npx @tresjs/cli gltf public/models/knight/Knight.glb`. It exposes the clips as
`actions`, keyed by a union of their names. See [`tres gltf`](https://docs.tresjs.org/cli/gltf).
:::
### Add Rig to the Scene
The Rig is the root object that contains the entire model and its animations. You can access it from the individual nodes.
:::tip
The Rig might be named differently depending on the model. Check the model's structure to find the correct root object.
:::
```vue [Knight.vue]
```
::
## Animation Control
::steps
### Use the `useAnimations` Composable
The `useAnimations` composable helps manage and play animations from your model. It takes the animations array and the rig as parameters and returns the `AnimationClips` (actions).
```vue [Knight.vue]
```
:::read-more{to="https://cientos.tresjs.org/api/miscellaneous/use-animations"}
Learn more about the `useAnimations` composable.
:::
### Play an Animation
You can play an animation by calling the `play` method on the desired action. For example, to play the "Cheer" animation:
```ts
const { actions } = useAnimations(animations, rig)
actions.Cheer?.play()
```
### Set animation loop
You can set the loop mode of an animation using the `setLoop` method. For example, to make the "Cheer" animation loop indefinitely:
```ts
actions.Cheer?.setLoop(THREE.LoopRepeat, Infinity)
actions.Cheer?.play()
```
### Smooth Animation Transitions
To create smooth transitions between animations, use the `fadeIn` and `fadeOut` methods. This prevents abrupt changes and creates more natural character movement:
```vue [Knight.vue]
```
**Key points about animation transitions:**
- `fadeOut(duration)` gradually reduces the animation's influence over the specified duration
- `fadeIn(duration)` gradually increases the animation's influence over the specified duration
- `reset()` resets the animation to its starting frame
- `setEffectiveWeight(1)` ensures the animation has full influence when active
- Shorter durations (0.1-0.3s) work well for quick actions, longer ones (0.5-1s) for smoother character transitions
::
# Advanced GSAP Animations
:examples-advanced-gsap-animations
This recipe demonstrates how to create sophisticated animations using GSAP (GreenSock Animation Platform) with TresJS for smooth, performance-optimized animations with advanced features like staggering and timeline control.
::steps
### Install GSAP
First, install GSAP as a dependency in your project:
:::code-group
```bash [npm]
npm install gsap
```
```bash [yarn]
yarn add gsap
```
```bash [pnpm]
pnpm install gsap
```
:::
### Import required modules
Import GSAP and the necessary Vue composables. Use `shallowRef` for better performance with Three.js objects:
```ts
import { shallowRef, watch } from 'vue'
import { OrbitControls } from '@tresjs/cientos'
import gsap from 'gsap'
```
:::tip
Use `shallowRef` instead of `ref` to avoid unnecessary reactivity on Three.js objects, which improves performance.
:::
### Create multiple objects to animate
Set up an array of positions for multiple boxes that will be animated with stagger effects:
```ts
const boxesRef = shallowRef()
const zs = []
for (let z = -4.5; z <= 4.5; z++) {
zs.push(z)
}
```
### Set up the scene structure
Create a group of meshes that will be animated together:
```vue
```
### Create the GSAP staggered animation
Use Vue's `watch` to set up the animation when the template ref is available:
```ts
watch(boxesRef, () => {
if (!boxesRef.value) return
// Get positions and rotations for all boxes
const positions = Array.from(boxesRef.value.children).map(
(child) => child.position
)
const rotations = Array.from(boxesRef.value.children).map(
(child) => child.rotation
)
const animProperties = {
ease: 'power1.inOut',
duration: 1,
stagger: {
each: 0.25,
repeat: -1,
yoyo: true,
},
}
// Animate positions
gsap.to(positions, {
y: 2.5,
...animProperties,
})
// Animate rotations
gsap.to(rotations, {
x: 2,
...animProperties,
})
})
```
### Understanding GSAP Stagger Options
The `stagger` property provides powerful control over timing:
```ts
const animProperties = {
ease: 'power1.inOut', // Easing function
duration: 1, // Animation duration in seconds
stagger: {
each: 0.25, // Delay between each object (0.25s)
repeat: -1, // Infinite repeat (-1)
yoyo: true, // Reverse on alternate cycles
from: 'start', // Animation direction (start, center, end)
},
}
```
:::read-more{to="https://gsap.com/docs/v3/Staggers/"}
Learn more about GSAP stagger options and configurations.
:::
::
## Advanced Techniques
### Timeline Control
:examples-advanced-gsap-timeline
For more complex sequences, use GSAP timelines to coordinate multiple animations:
```vue [TimelineAnimation.vue]
```
### Performance Optimization
When animating many objects, optimize performance by:
1. **Use `shallowRef`** for Three.js object references
2. **Batch property access** to avoid repeated DOM queries
3. **Use GSAP's `set()` method** for immediate property changes
4. **Leverage hardware acceleration** with `force3D: true`
```ts
// Optimized animation setup
const optimizedAnimation = () => {
// Get all properties at once
const meshes = Array.from(boxesRef.value.children)
const positions = meshes.map(mesh => mesh.position)
const rotations = meshes.map(mesh => mesh.rotation)
// Use force3D for hardware acceleration
gsap.to(positions, {
y: 2,
duration: 1,
force3D: true,
ease: 'power2.out'
})
}
```
### Animation Events
GSAP provides powerful callback events to sync with your application state:
```ts
gsap.to(positions, {
y: 2,
duration: 1,
stagger: 0.1,
onStart: () => console.log('Animation started'),
onComplete: () => console.log('Animation completed'),
onUpdate: function() {
// Called on every frame
console.log('Progress:', this.progress())
},
onRepeat: () => console.log('Animation repeated')
})
```
::tip
GSAP automatically handles frame rate optimization and provides better performance than manual animations for complex sequences.
::
::read-more{to="https://gsap.com/docs/v3/"}
Explore the full GSAP documentation for advanced features and techniques.
::
# Tweakpane
[Tweakpane](https://tweakpane.github.io/docs/){rel=""nofollow""} is a compact GUI library that provides an excellent way to create interactive controls for your 3D scenes. This recipe shows you how to integrate Tweakpane with TresJS to create dynamic, real-time controls for your 3D objects and scenes.
:examples-tweakpane
## Installation
First, install Tweakpane v4 in your project:
::code-group
```bash [npm]
npm install tweakpane@^4.0.0
```
```bash [yarn]
yarn add tweakpane@^4.0.0
```
```bash [pnpm]
pnpm add tweakpane@^4.0.0
```
::
Additionally, if you are working with TypeScript:
::code-group
```bash [npm]
npm install --save-dev @tweakpane/core
```
```bash [yarn]
yarn add --save-dev @tweakpane/core
```
```bash [pnpm]
pnpm add --save-dev @tweakpane/core
```
::
::tip
Make sure to use Tweakpane v4 or higher, as this recipe uses the latest API which has breaking changes from v3.
::
## Basic Setup
Here's how to set up Tweakpane with a basic TresJS scene:
```vue
```
### Monitoring Values
You can also monitor values without making them editable:
```ts
const stats = ref({
triangles: 0,
fps: 0,
})
const statsFolder = pane.value.addFolder({ title: 'Statistics' })
statsFolder.addMonitor(stats.value, 'triangles')
statsFolder.addMonitor(stats.value, 'fps', { interval: 100 })
```
## Cleanup
Don't forget to dispose of the pane when the component unmounts:
```ts
import { onUnmounted } from 'vue'
onUnmounted(() => {
pane.value?.dispose()
})
```
::tip
Always dispose of the pane instance to prevent memory leaks, especially in SPAs where components are frequently mounted/unmounted.
::
# Dynamic components
:examples-dynamic-transition
This recipe covers how to use [``](https://vuejs.org/guide/built-ins/transition.html#transition){rel=""nofollow""} and [`Dynamic`](https://vuejs.org/guide/essentials/component-basics.html#dynamic-components){rel=""nofollow""} Vue built-in components.
::steps
### Set up our main scene
Let's start with a simple scene.
```vue [main.vue]
```
### Let's create two simple components
I'm going to add some simple animation logic just to add a little more life.
```vue [Box.vue]
```
```vue [Sphere.vue]
```
### Using Vue dynamic components
You can use [dynamic components](https://vuejs.org/guide/essentials/component-basics.html#dynamic-components){rel=""nofollow""} just as you would in Vue.js. There are several ways to do this, but here we’ll follow the official Vue example.
- First, we create a ref that contains our **current** component name.
- Then we create another object that will contain **all our [dynamic components].({rel=""nofollow""})**.
- After that, we can define a simple function to change our ref to the new component.
- Don't forget to add the `` to our scene.
```vue [main.vue] {7-14,23}
```
### Adding UI controls to switch components
To be able to switch between components, lets add a floating UI containing buttons to change between the **Box** and the **Sphere**
```vue
```
Let's add a little CSS.
```vue
```
:examples-dynamic-transition-only-dynamic
:::prose-note
You can use [KeepAlive](https://vuejs.org/guide/built-ins/keep-alive.html#keepalive){rel=""nofollow""} if you want component instances to be cached and preserved between component switches
:::
::
::steps
## Adding transitions
### Wrap the component inside the [``](https://vuejs.org/guide/built-ins/transition.html#transition){rel=""nofollow""}
Once we know the power of using dynamic components, we can create more interactive scenes using built-in Vue components! Now let's add a little animation using [`GSAP`](https://gsap.com/){rel=""nofollow""} and [``](https://vuejs.org/guide/built-ins/transition.html#transition){rel=""nofollow""} components.
For that, the first step is to wrap our dynamic component in a [``](https://vuejs.org/guide/built-ins/transition.html#transition){rel=""nofollow""}.
Very important: we need to tell our component that we're going to handle our animations using `JS`, not `CSS`, by using the prop `:css="false"`. Otherwise, the component will search for a DOM element and will fail.
:::prose-note
Elements inside Tres.js live inside a canvas, not in the DOM.
:::
```html
```
### Using JS hooks
Then we can use the provided [JS hooks](https://vuejs.org/guide/built-ins/transition.html#javascript-hooks){rel=""nofollow""}; in this demo, we're going to use `@enter` and `@leave`.
```html
```
### Now it's time to animate!
In case you haven't installed it already, install [GSAP](https://gsap.com/){rel=""nofollow""} as a dependency in your project:
:::code-group
```bash [npm]
npm install gsap
```
```bash [yarn]
yarn add gsap
```
```bash [pnpm]
pnpm install gsap
```
:::
In our `onEnter` and `onLeave` functions, we put our desired animations. As the names indicate, one controls when the element enters the scene and the other when it leaves.
```js
import { gsap } from 'gsap' // don't forget to import GSAP
function onEnter(el) {
gsap.from(el.material, { duration: 1, opacity: 0 })
}
function onLeave(el, done) {
gsap.to(el.material, { duration: 0.05, opacity: 0 })
}
```
:::prose-note
Important: note that animating the `opacity` works here because we set `transparent` in our materials.
:::
## Full example of our main component
```vue